Why read this article?
Because if you are who we think you are, investing 10 minutes of your precious time now to read this article will save you a lot of time in the future as you bring your idea to life.
This is a two-part article which will walk you through five essential parts of the You3Dit Process:
- Who is a “Maker” in the You3Dit network? (Part 1)
- How much does it cost (Part 1)
- Creating a Project (Part 1)
- Getting your idea designed in 3D (Part 2)
- Getting your new 3D Design fabricated (Part 2)
But first…
Who is a “Maker” on the You3Dit network?
If you have an idea of something you want built and need help getting the 3D Design and Rapid Prototyping completed, you’re considered a “Maker” in our network. You represent our client base and we’re eager to help you bring your idea to life. You are the client, the customer, the lifeblood that fuels our zero-to-prototype marketplace.
If you’re a 3D Designer, this article is for you: Mastering You3Dit Beta as a Designer
If you’re a Fabricator, then this article is for you: Mastering You3Dit Beta as a Fabricator
What does it mean to “master You3Dit Beta” as a Maker?
We know it takes some time to ramp up with any new product or service. We hope this article builds your confidence in You3Dit to bring your hardware idea to life with us.
First, you should know that there are currently two You3Dit websites where you can bring your ideas to life:
- https://www.you3dit.com – our flagship platform and where all of our internet traffic is currently routed. This is the website where we’ve helped our clients kickoff over 800 projects all around the world. We have 3D Designers and Fabricators in over 34 countries today! It’s where we also learned a ton about what worked and didn’t work about that website from our initial Makers, Designers and Fabricators. Leveraging their feedback, we now have:
- https://beta.you3dit.com – our fully-functional, You3Dit Beta platform where we’ve invested the blood, sweat and tears re-inventing You3Dit from the ground up to be more powerful, more streamlined and more user friendly zero-to-prototype process for all people on the platform.
As we plan to sunset the original You3Dit.com and replace it with Beta, we have to do so tactfully and ensure continuity with all the current projects in flight. And we’re leaning on our early and dedicated Makers to help us polish our new Beta platform so that it’s ready for primetime when we officially launch.
Thus, for those of you who are utilizing Beta, we’d like to inform you of some key work arounds and known issues to better help you navigate a smooth & more delightful user experience.
Commonly known errors and issues across all users: Makers, Designers and Fabricators
We already wrote a general article on common issues and provided temporary workarounds. You can read that here: Common pitfalls and workarounds on You3Dit Beta
But for more detailed description of what you’re about to go through, keep reading.
Creating a new project on You3Dit Beta
First, we’re so glad you’re taking the bold step of bringing a physical part, product or prototype to life. Not many have the courage to do this. It can be a scary process with lots of unknowns. That’s precisely why we’re here.
Second, if you’ve been told about You3Dit Beta as a Maker, it likely means one of the following things:
- You have a product idea that we believe you want to prototype and eventually scale (10K+ parts)
- You have an IoT product and you need help with mechanical engineering and Design for Manufacturing and Assembly (DFMA)
- You have an industrial prototyping idea you need help developing with respect to Design and Fabrication, DFMA, etc.
- You need Industrial Design services
- You need Advanced Prototyping Services
- You’ve found us through your curiosity and dedication to exploring our original You3Dit.com website.
If this all sounds right, then you’re likely in the right place at You3Dit Beta and you’re ready to create your new project.
What does it cost?
This is the question on every Maker’s mind. What does it cost to bring my idea to life? It’s nearly impossible for us to tell you without having a basic understanding of your project goals. Read our blog post on What does it cost to design and fabricate a prototype? to get a better idea of how far your money can take you.
How to best get ready to submit a new project on You3Dit Beta?
We know that many of our clients like to be prepared in advance before they submit their projects. If you’re one of those people, we recommend you read the blog post: How to best get ready to submit a new project on You3Dit Beta. However, we do believe the process is rather intuitive and if you’re feeling bold, just give it a shot.
Kicking off your new project on You3Dit Beta
In general, we worked hard to create an intuitive zero-to-prototype process. But it’s nearly impossible to arrive at the correct solution in the first iteration. Thus this is our second major iteration at You3Dit.com and we call it: You3Dit Beta. Welcome to the future of 3D Design and Rapid Prototyping.
Start a project:
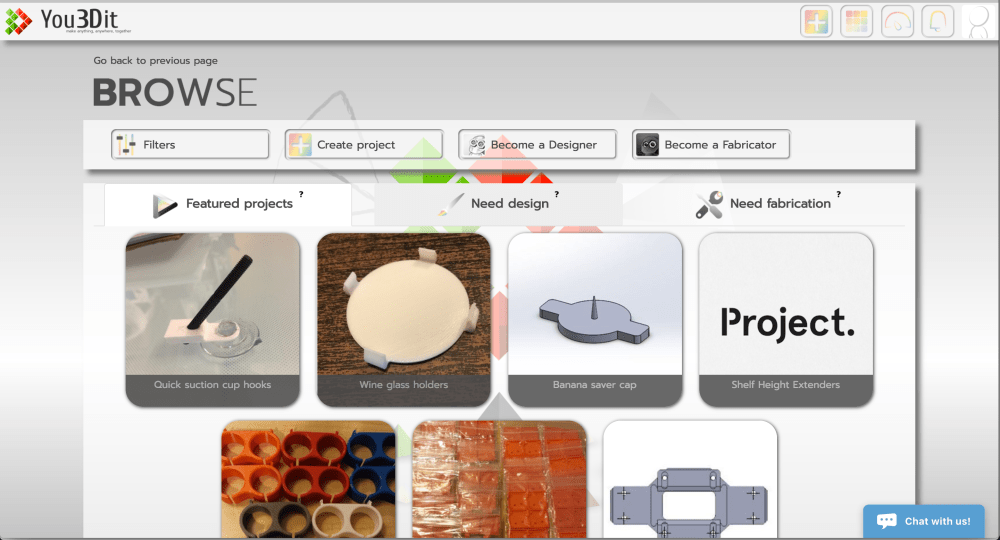
You are also free to familiarize yourself with other completed projects by clicking into any of our “Featured Projects”. You can also browse the other projects that either “Need Design” or “Need Fabrication”. You can ask yourself, “Does that project make sense?” “Would I be able to visualize a 3D Design for that project?” “How will they make that?” Feel free to add a public comment if you have ideas or questions!
1) Create a Project
You’re going to go through nine important steps. Think of it like the TurboTax of 3D Design and Rapid Prototyping. It’s not hard, but it will require your focus.
…and have no fear, you don’t need all the answers. If you’re not sure about how to answer one of our questions, choose: “Not Sure”:
- Choose a Service > Design Only | Design & Fabrication | Fabrication Only
- Materials > Plastics | Organics | Metals | Ceramics and more.
- Colors > Most colors under the rainbow
- Size > Roughly | Exact | Not Sure
- Quantity > Any number you want
- Upload Sketches > Upload at least one JPG. PDFs, PNGs, Existing CAD files also OK. | Add project details + description
- Title > Descriptive title of your project
- Wish Date & Delivery Address > a desired delivery date + your physical address
- Confirmation
Choose a Service
If you’re ready to go, click the “Create a Project” button or the “+” button in the upper right hand corner. Then you’ll encounter the “Choose a Service” screen.
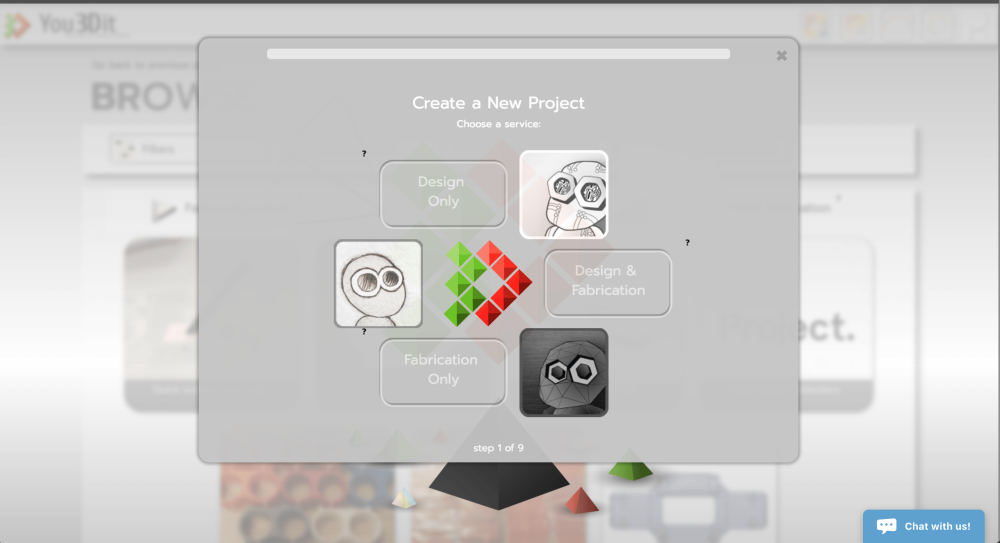
Design Only – choose this option if you have a napkin sketch of an idea you want created so that you can produce it on a 3D printer, laser cutter or a CNC machine. We have these machines in our network as well, but some people just need the 3D Design…aka the CAD file to get their 3D printer fabricating their next big invention. You can always convert a “Design Only” project into a “Fabrication Only” project once the design is completed if you determine your machine won’t get the job done to your satisfaction.
MAKER INPUT > Napkin Sketch or Photo + description. YOU3DIT OUTPUT: 3D Design Files
Design & Fabrication – Choose this option if you want to go from “zero-to-prototype” or “sketch-to-solid”. This is your full service, end-to-end process which literally brings your idea to life by leveraging our extensive 3D Design and Fabrication network. We created the company in 2012 with the fundamental view that 3D Design and Manufacturing should be inextricably linked and that automation would dramatically transform hardware production as we know it. So that’s what we’ve built. We’ve been described as “Frog Design meets Flextronics” in the cloud. Literally, you need to know very little about the hardware process to get started. Can you use Instagram or Facebook? Then you can use You3Dit Beta. Simply upload a napkin sketch or a photo of the use case for your project is all that’s needed. See the How to best get ready to submit a new project on You3Dit Beta section in this article above.
MAKER INPUT > Napkin Sketch or Photo + description. YOU3DIT OUTPUT: 3D Design Files and Fabricated part(s) to client specifications.
Fabrication Only – Choose this option if you already have your design files ready to go and you’d like to have any one of our many digital fabrication machines manufacture your design. Our most common machines are 3D printers, laser cutters and CNC machines, but we also have water jet cutting of metal, metal 3D printers and other advanced machines. You can also utilize our fabrication platform to ensure large, at-scale orders get managed and procured effectively.
MAKER INPUT > 3D Design File. YOU3DIT OUTPUT: Fabricated part(s).
In this example, we’re going to choose the Design & Fabrication option so you can see the full process at work.
Back to Create a Project Overview
Materials
This is an extremely important question for every project because it often times defines mechanical capability of the part & the fabrication process that’s utilized to manufacture the part. We provide a list of many materials because we’re always expanding our capabilities based on the requests of our customers and fabricator capability, but here’s a quick list of what materials we have in our database:
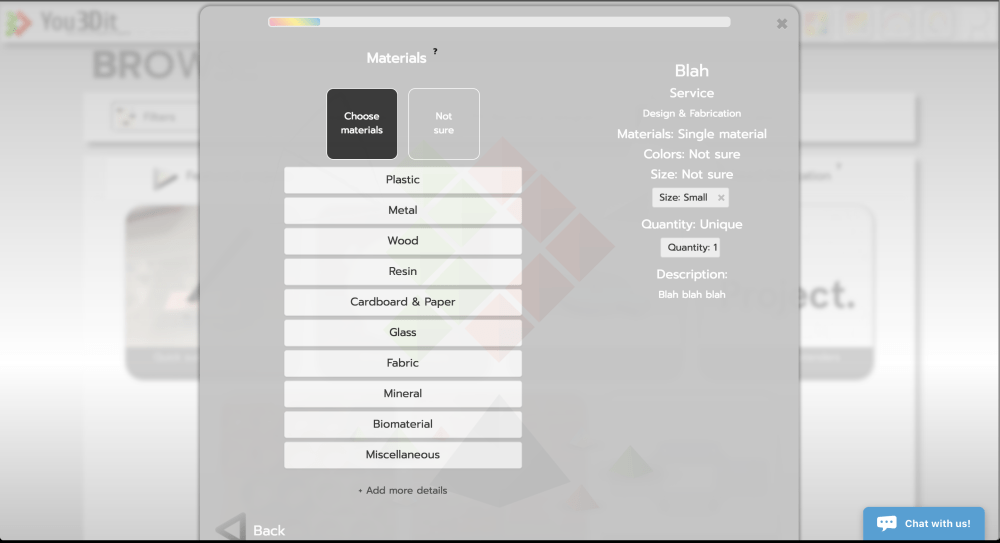
You can click into any category to dive deeper if you know what you’re looking for.
- Common materials for 3D Printing are: ABS, PLA, Nylon, NinjaFlex and other plastics.
- Common materials for Laser Cutting are: thin wood sheets, acrylics and other materials that are non-toxic when combusted.
- Common Materials for CNC machines typically cut metals (aluminums, steels, alloys), plastics and woods.
You can always specify “not sure” if in fact you aren’t sure. The designer will propose these details for you.
Back to Create a Project Overview
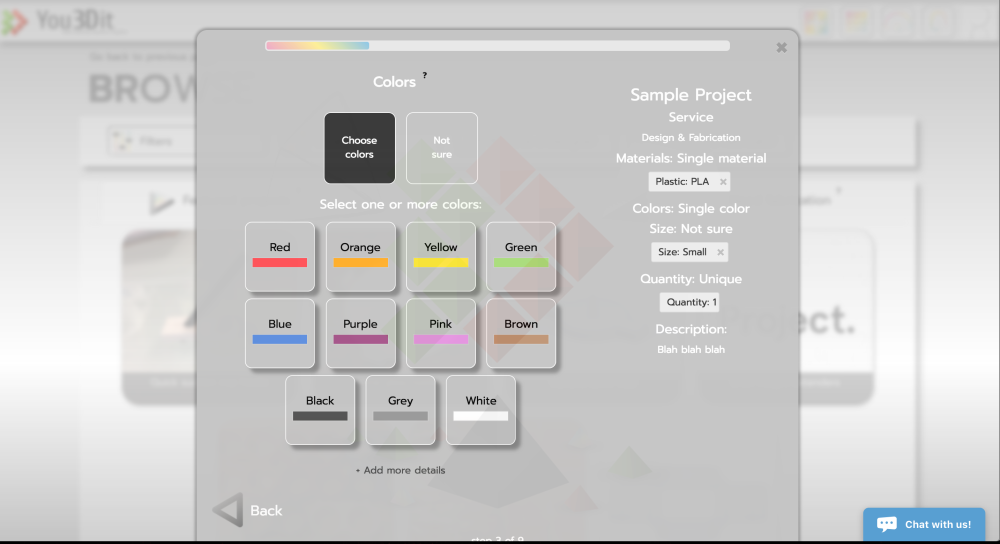
Colors
This is pretty obvious but to be complete, you can specify color and finish details in the “add more details” section at the bottom of most pages. Just mention natural finish and we won’t attempt any coloration or post fabrication processes:
Back to Create a Project Overview
Size
The rough, exact or general size of your concept matters for a number of reasons. The key take away here is that you don’t HAVE to know what size it will be…but if you do have specific dimensions that you want, here’s your opportunity to tell your 3D Designer:
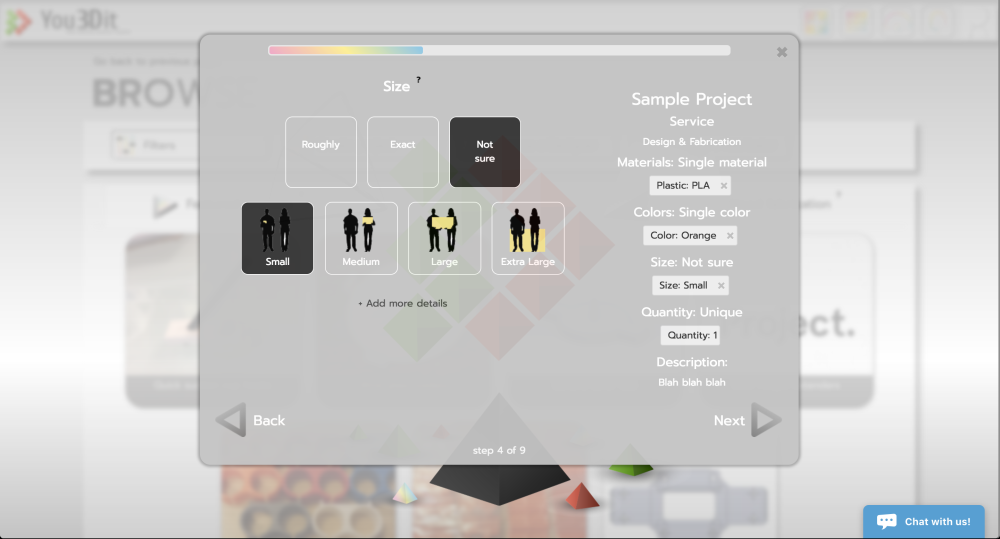
Size also helps route the right fabricator to your job. Large objects are typically more challenging for many digital fabrication machines. But clever designers and fabricators have ways around all of these challenges.
Back to Create a Project Overview
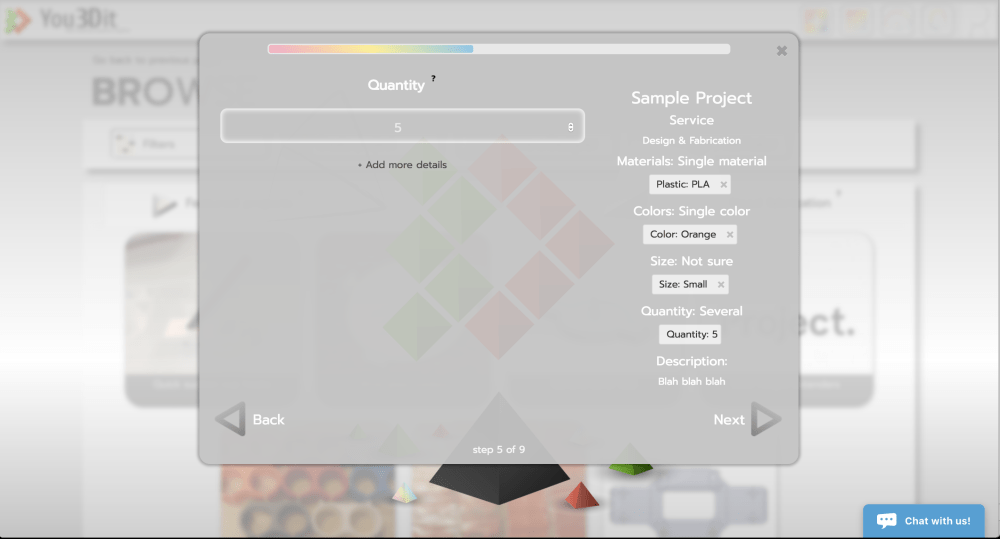
Quantity
This question can dramatically change how your concept is 3D Designed and Fabricated. It’s important you think carefully about this question if you want to have a good experience at You3Dit. We have five different quantity categories:
- 1 => Unique (cost per part => VERY HIGH)
- 2-9 => Several (cost per part => HIGH)
- 10-99 => Low Volume (cost per part => MEDIUM)
- 100-999 => Medium Volume (cost per part => MEDIUM LOW)
- 1000+ => High Volume (cost per part => LOW)
On the design side, these varied quantities indicate unique, one-off custom jobs, to low volume prototyping and then high-volume, at-scale manufacturing. They all have very different approaches for both design and manufacturing. We always suggest to start small…even if you “know” you’ll scale your project to mass production volumes. Better to get prototypes and test in the market to ensure you have all the right features for your prospective clients and aren’t wasting your time, money and other resources on features they don’t actually care about. To learn more about market testing, read this article on the Rapid Innovation Cycle).
Back to Create a Project Overview
Upload Sketches + Project Description
This is a very important step. This is where you upload all the key details about your concept that we need in order to find the best designer for your job.
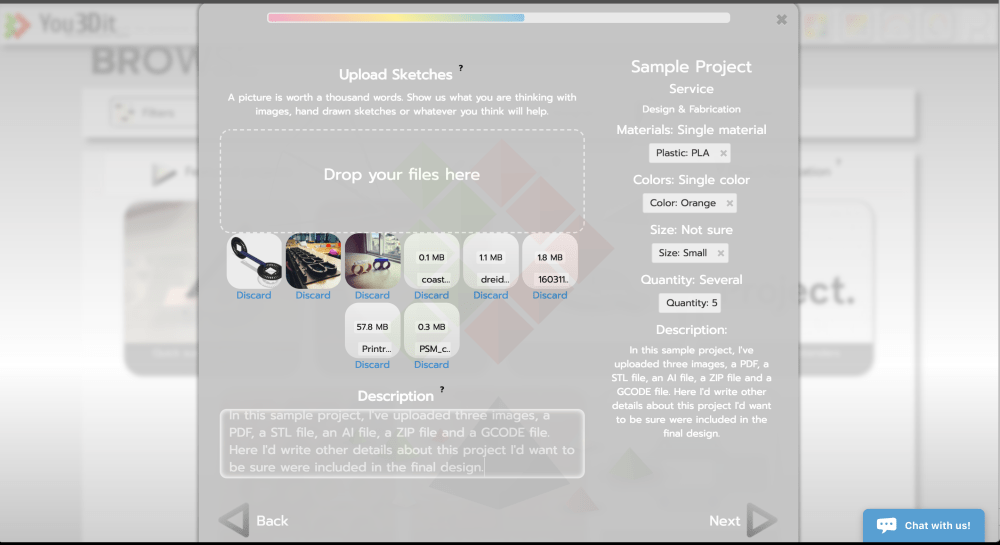
See the article about what are the MUST HAVE, SHOULD HAVE, and NICE-TO-HAVE files that you should include in your new project: How to best get ready to submit a new project on You3Dit Beta
Back to Create a Project Overview
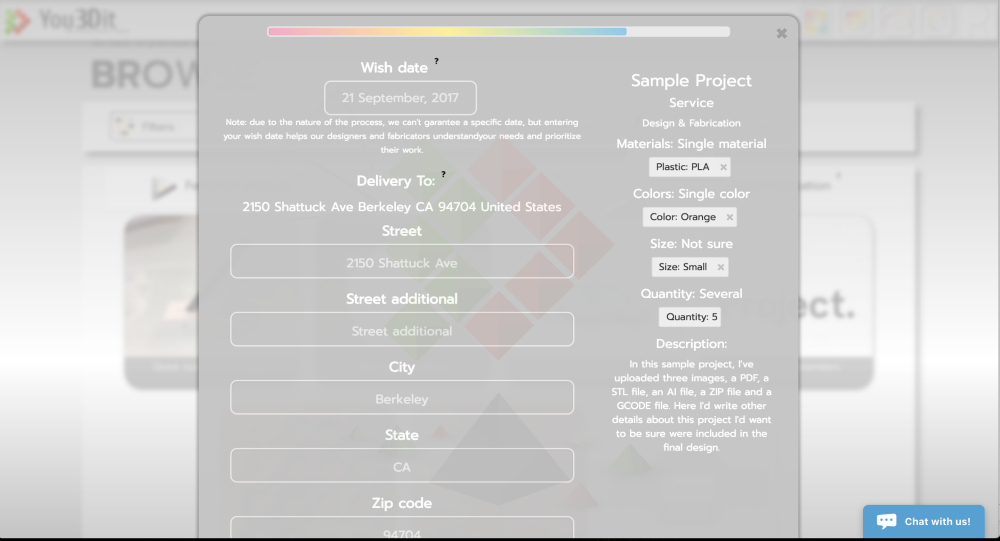
Wish Date and Delivery Address
At this step, you define your schedule and where the parts will be sent. These addresses can be updated in your profile page as well. They can also be changed up until the point you have Fabrication quotes submitted (as that’s when shipping estimates are also quoted).
Today we don’t formalize the rush process, but eventually you’ll be able to choose dates to allow for rush processing.
Back to Create a Project Overview
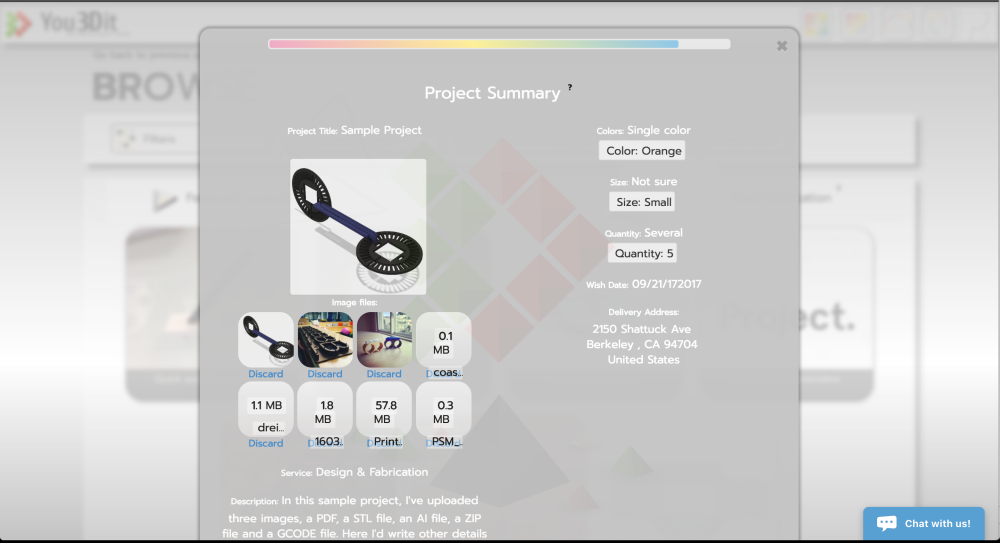
Confirmation
Make sure you’ve got all the details correct and get prepared for your project takeoff!
There you have it, that’s the 9 step process you need to kickstart your part, product, or prototype idea!
Back to Create a Project Overview
Let us know if you have any questions: chris at you3dit dot com
Other useful articles to read are:
