The Mobile 3D Printing Experiment

There is something about the human spirit that sometimes chooses to ignore rationality in preference for the wild and crazy.  This Mobile 3D Printing Experiment is one of those cases.

Just dialing in all the details.
Just dialing in all the details in the Best Buy parking lot in Pleasanton, CA.  Chris McCoy–the lead researcher on this experiment–is getting everything hooked up and ready to go on his journey to Santa Barbara, CA (about a 4 hour drive from the Bay Area).

The day started off at 06h00 with packing suitcases and 3D printer necessities (Octoprint server, Cubicity filament.  Chris had an appointment with Bobby from Craigslist.org to buy a Honda 2000i generator.  At 08h00 the generator was purchased and relocation to a Home Depot was in order to properly set up the 3D printer / generator setup.

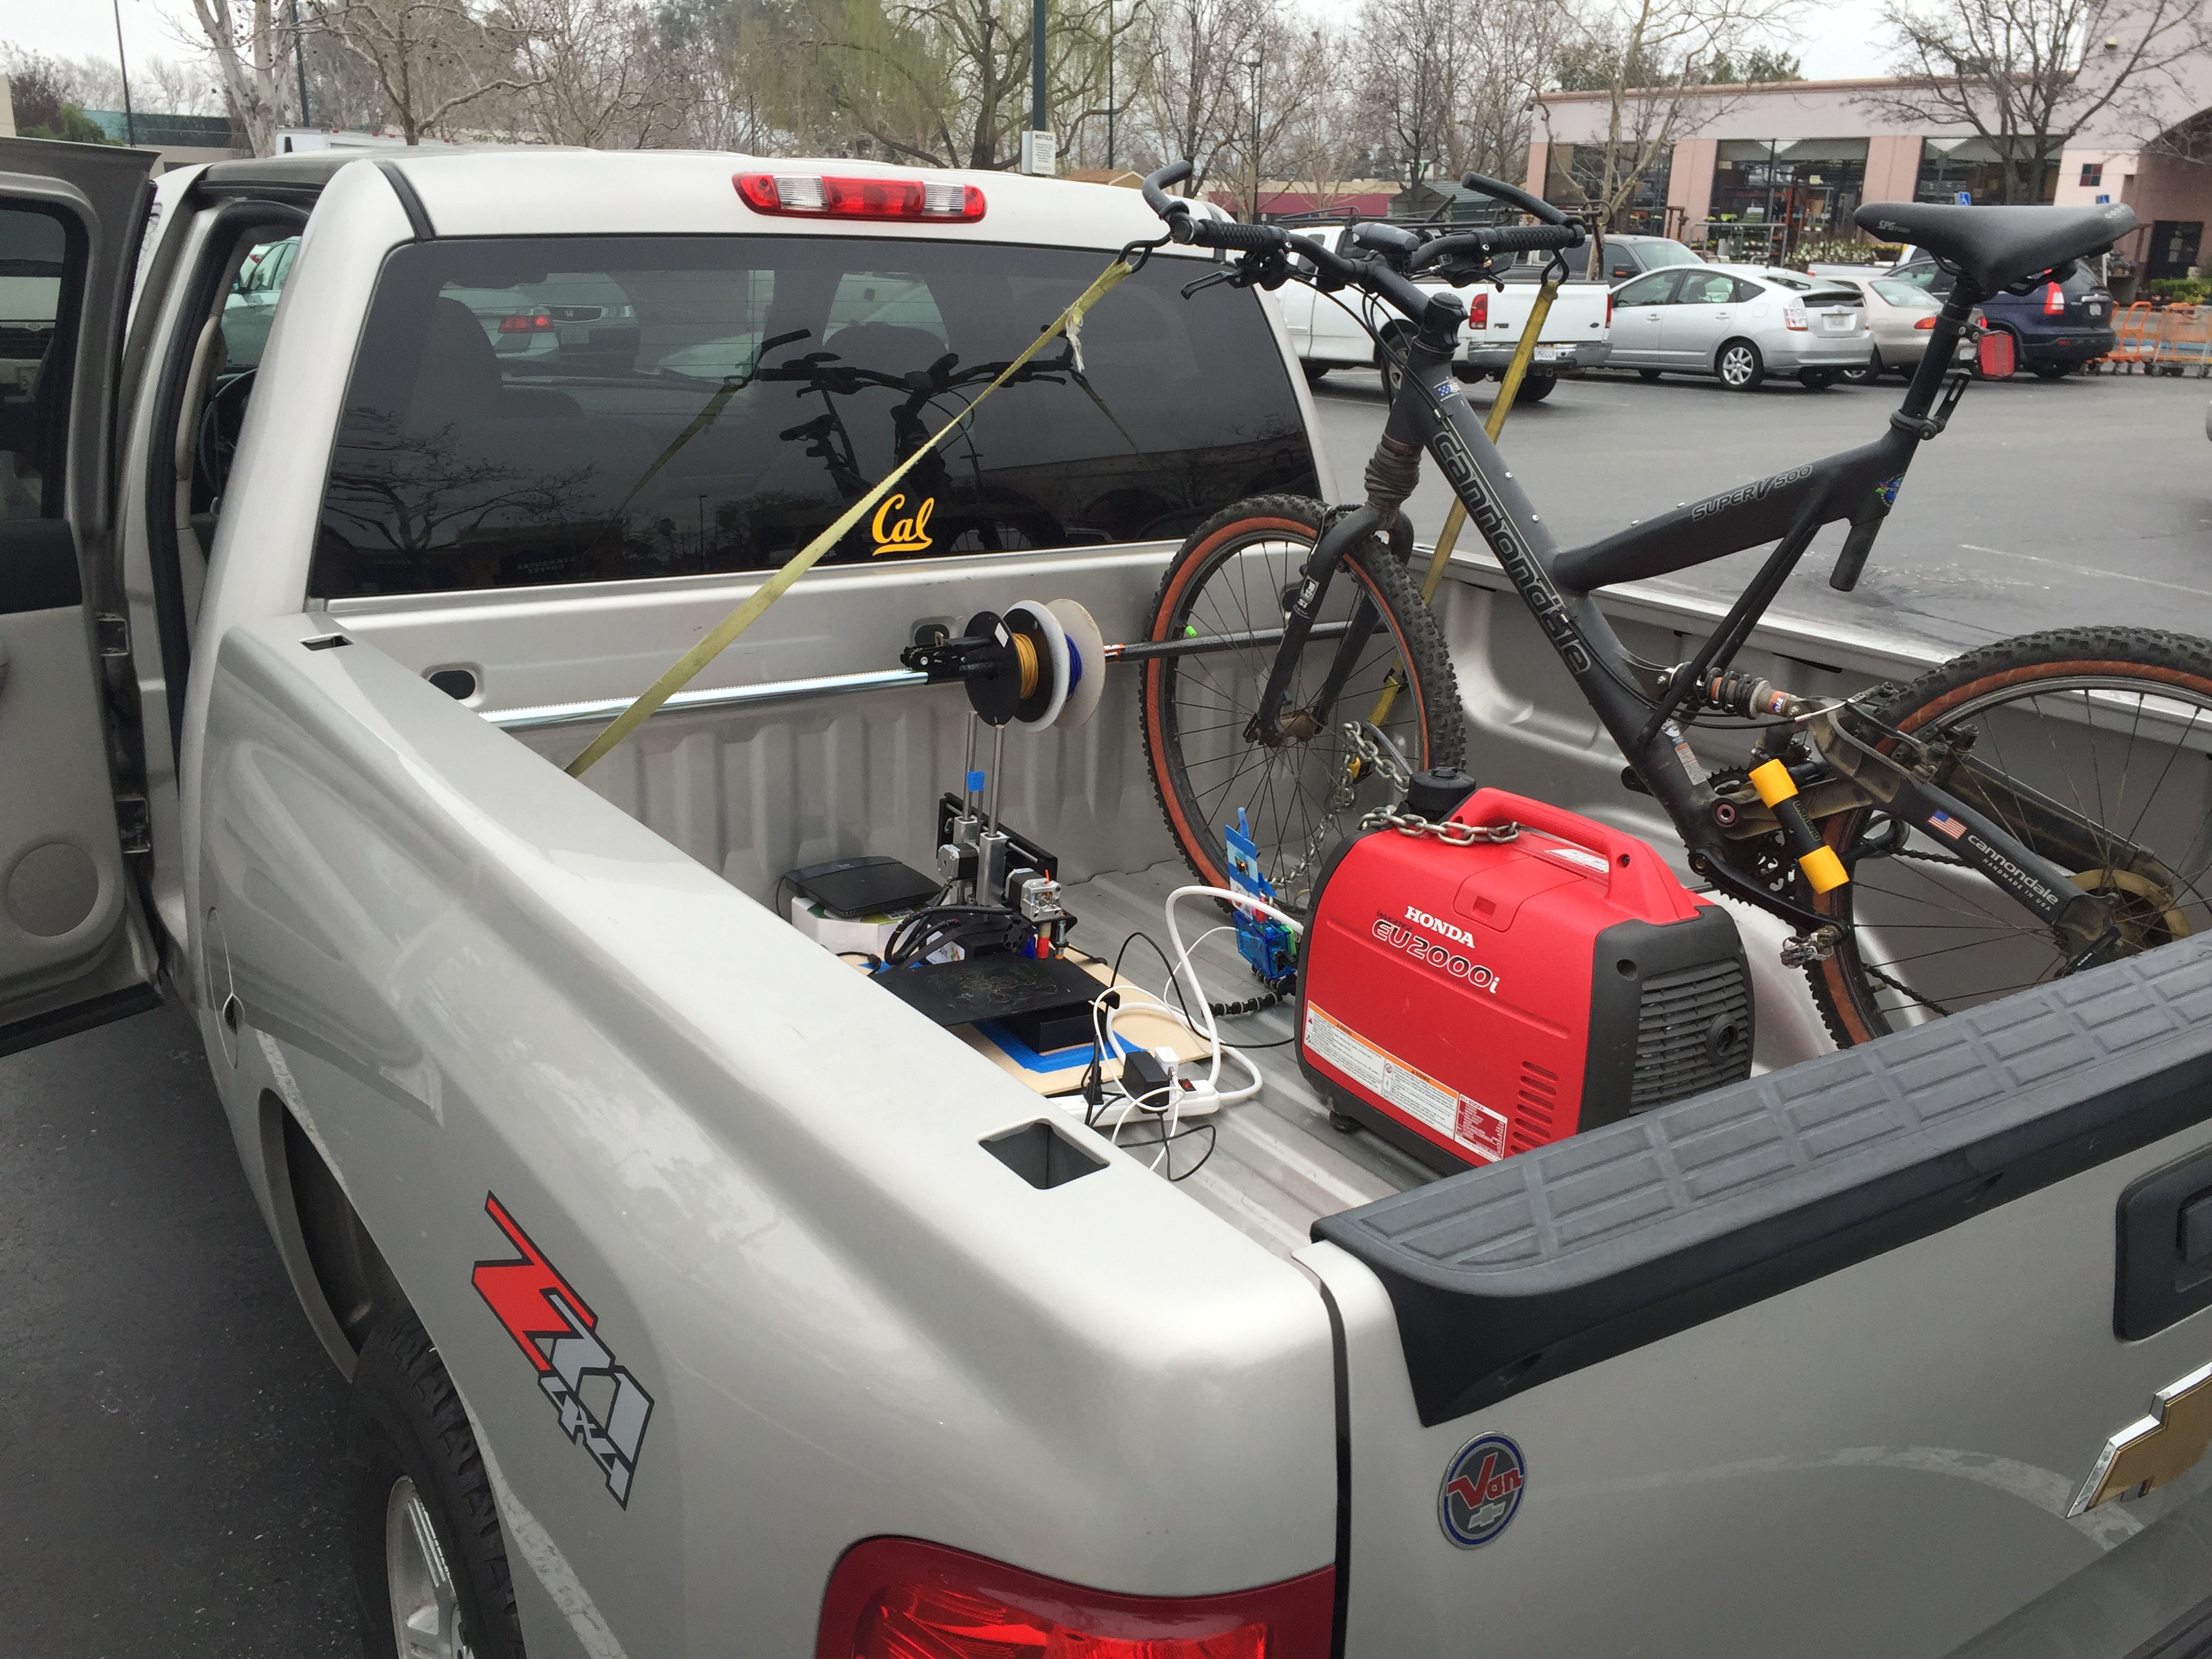
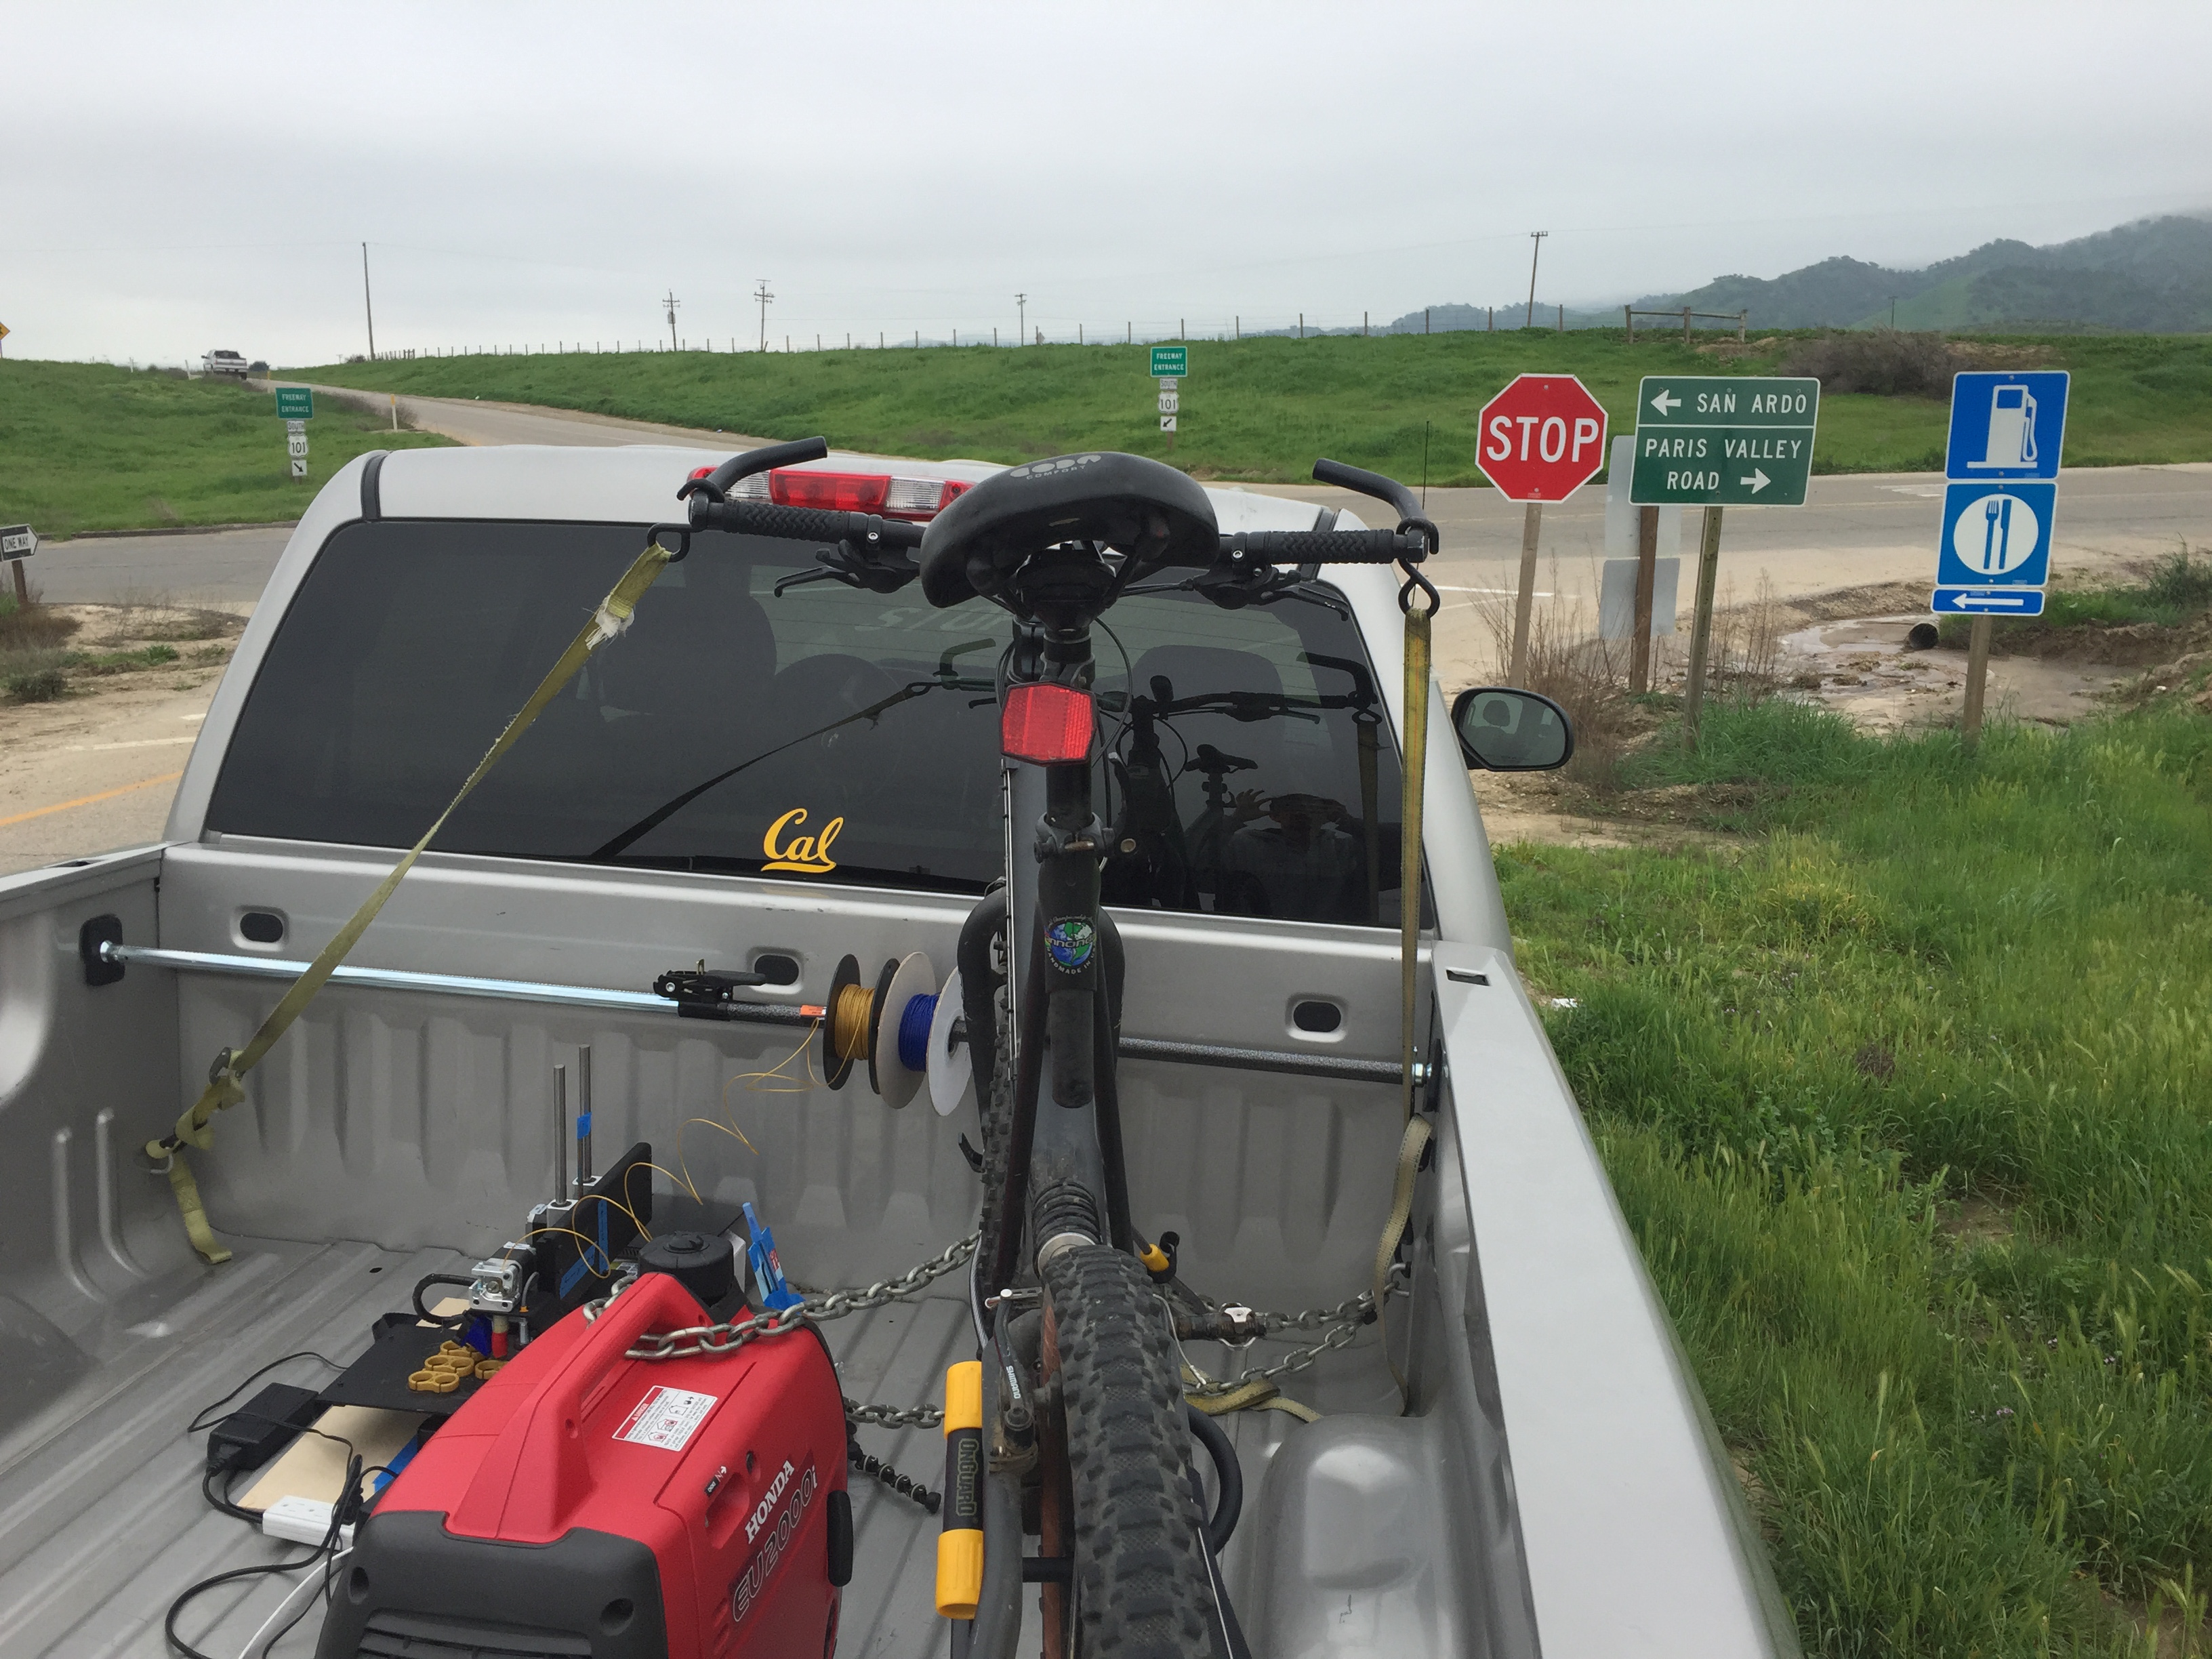
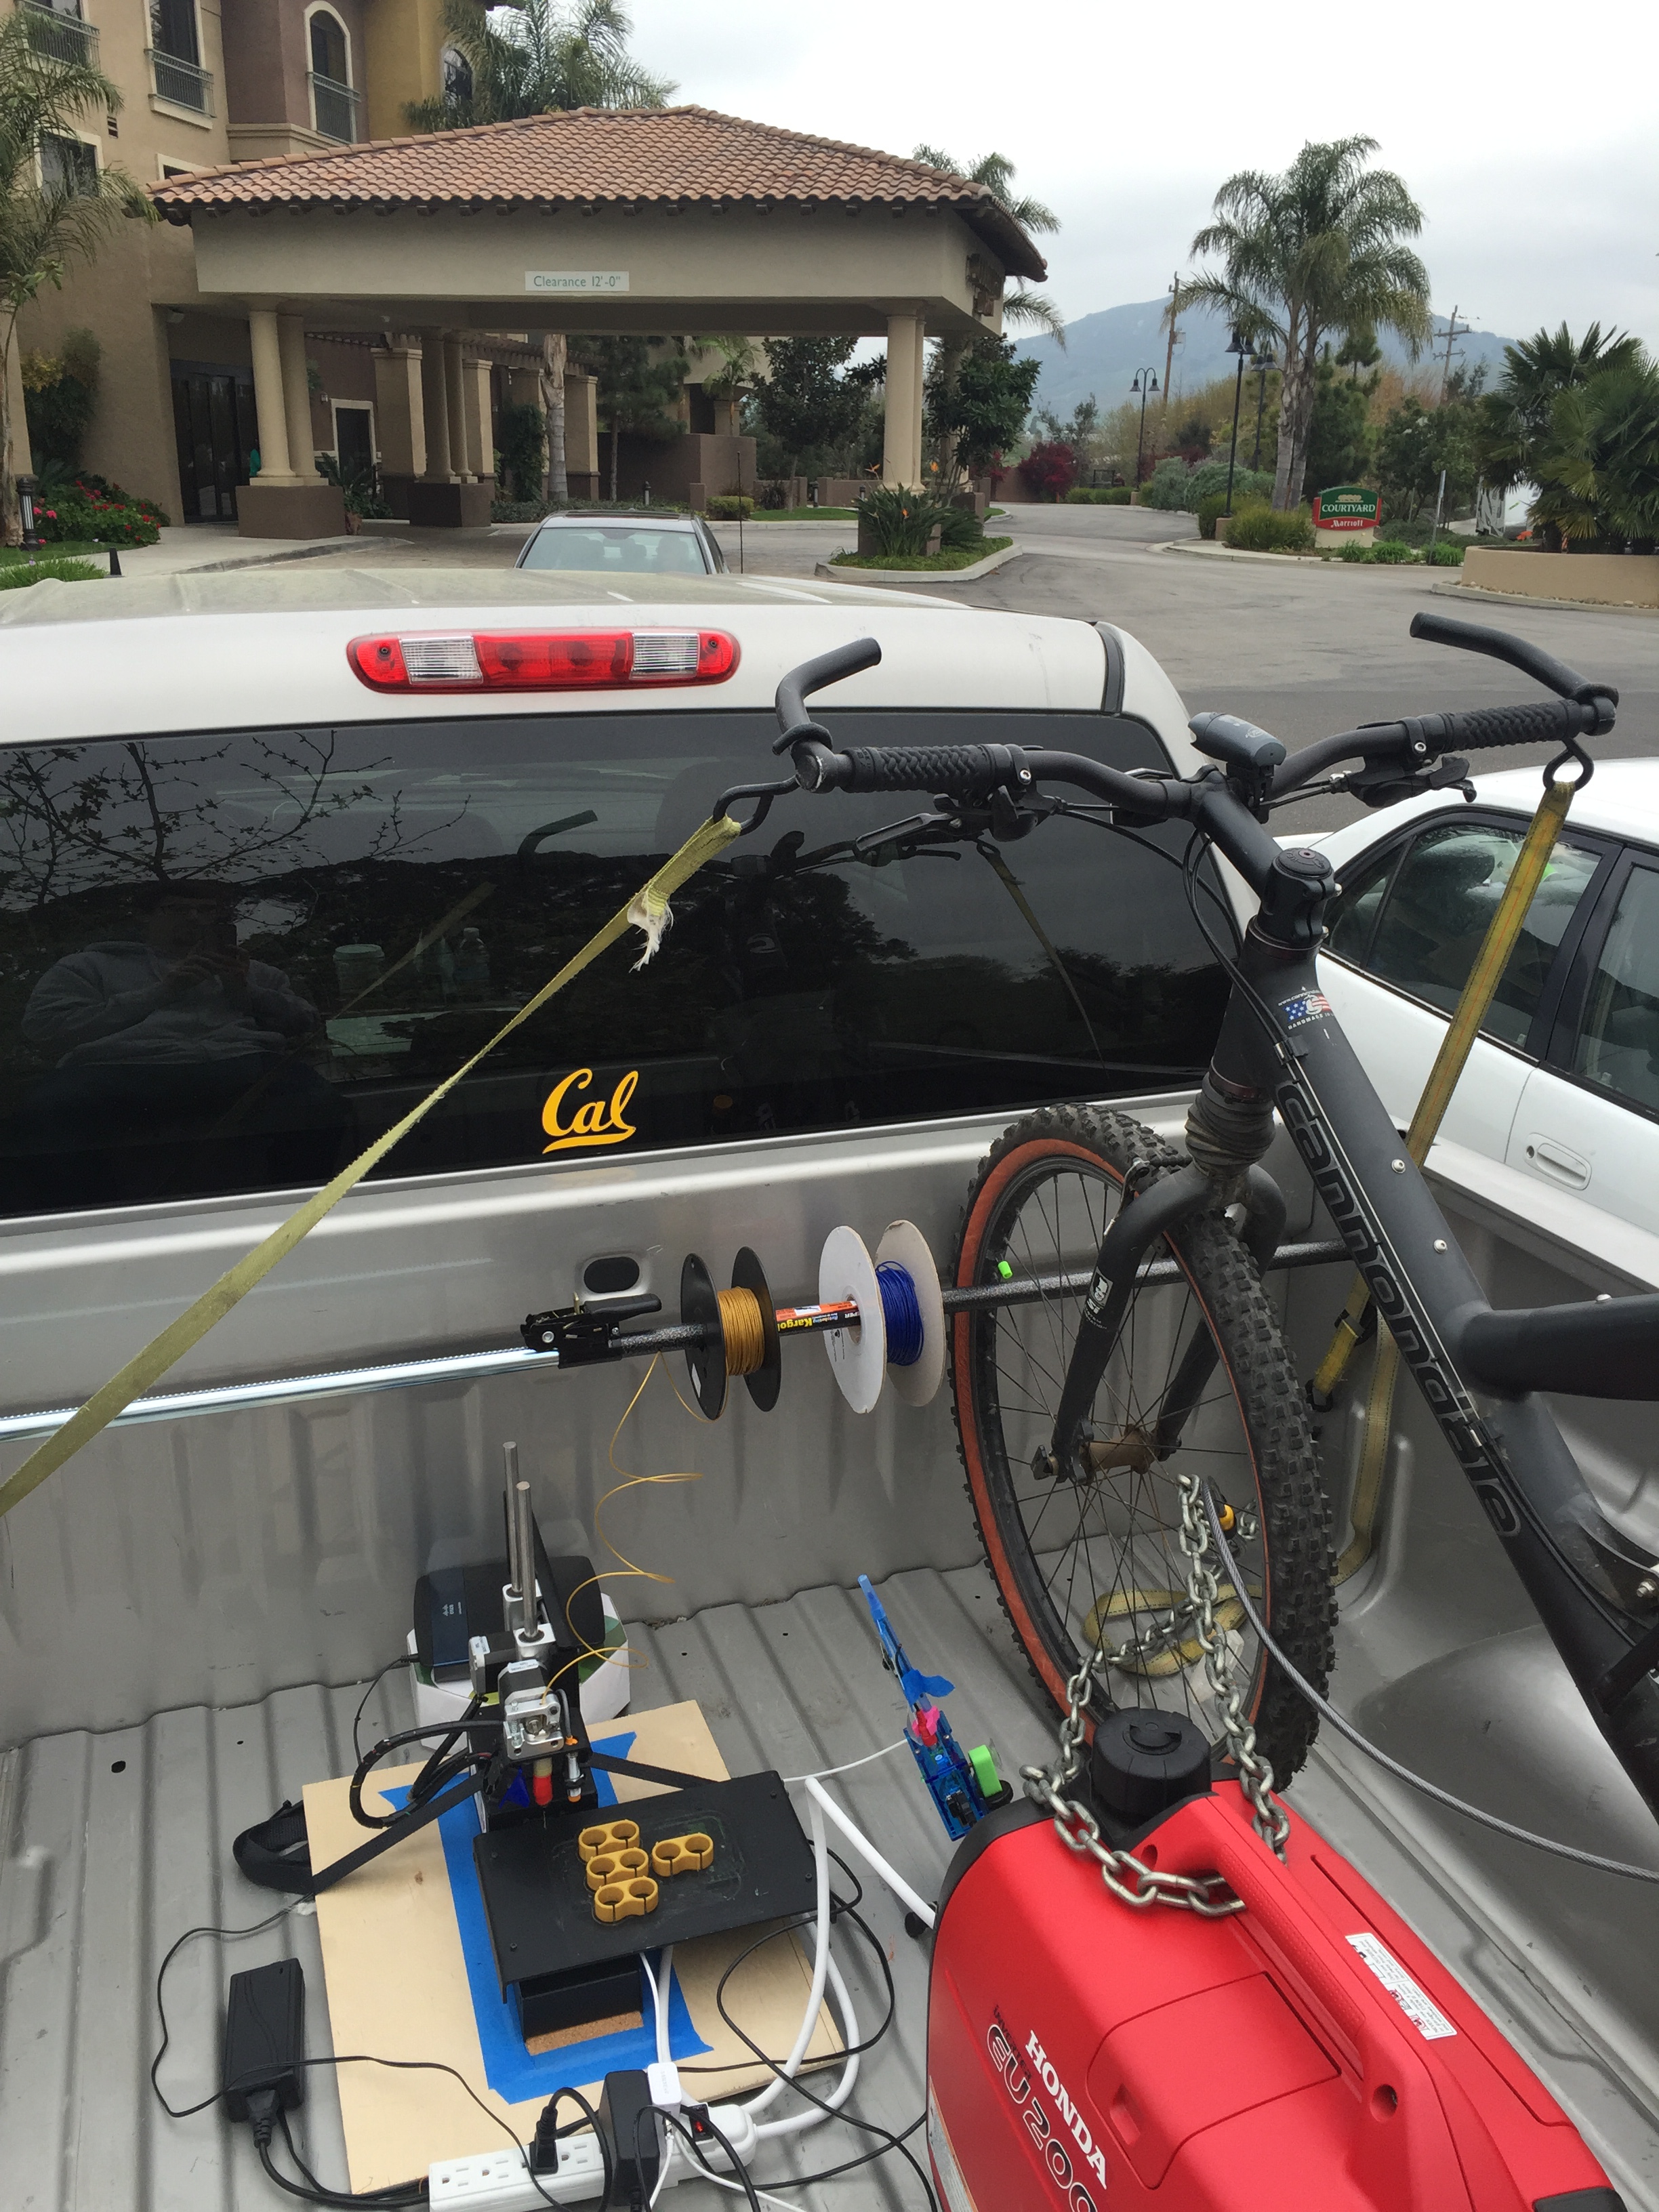
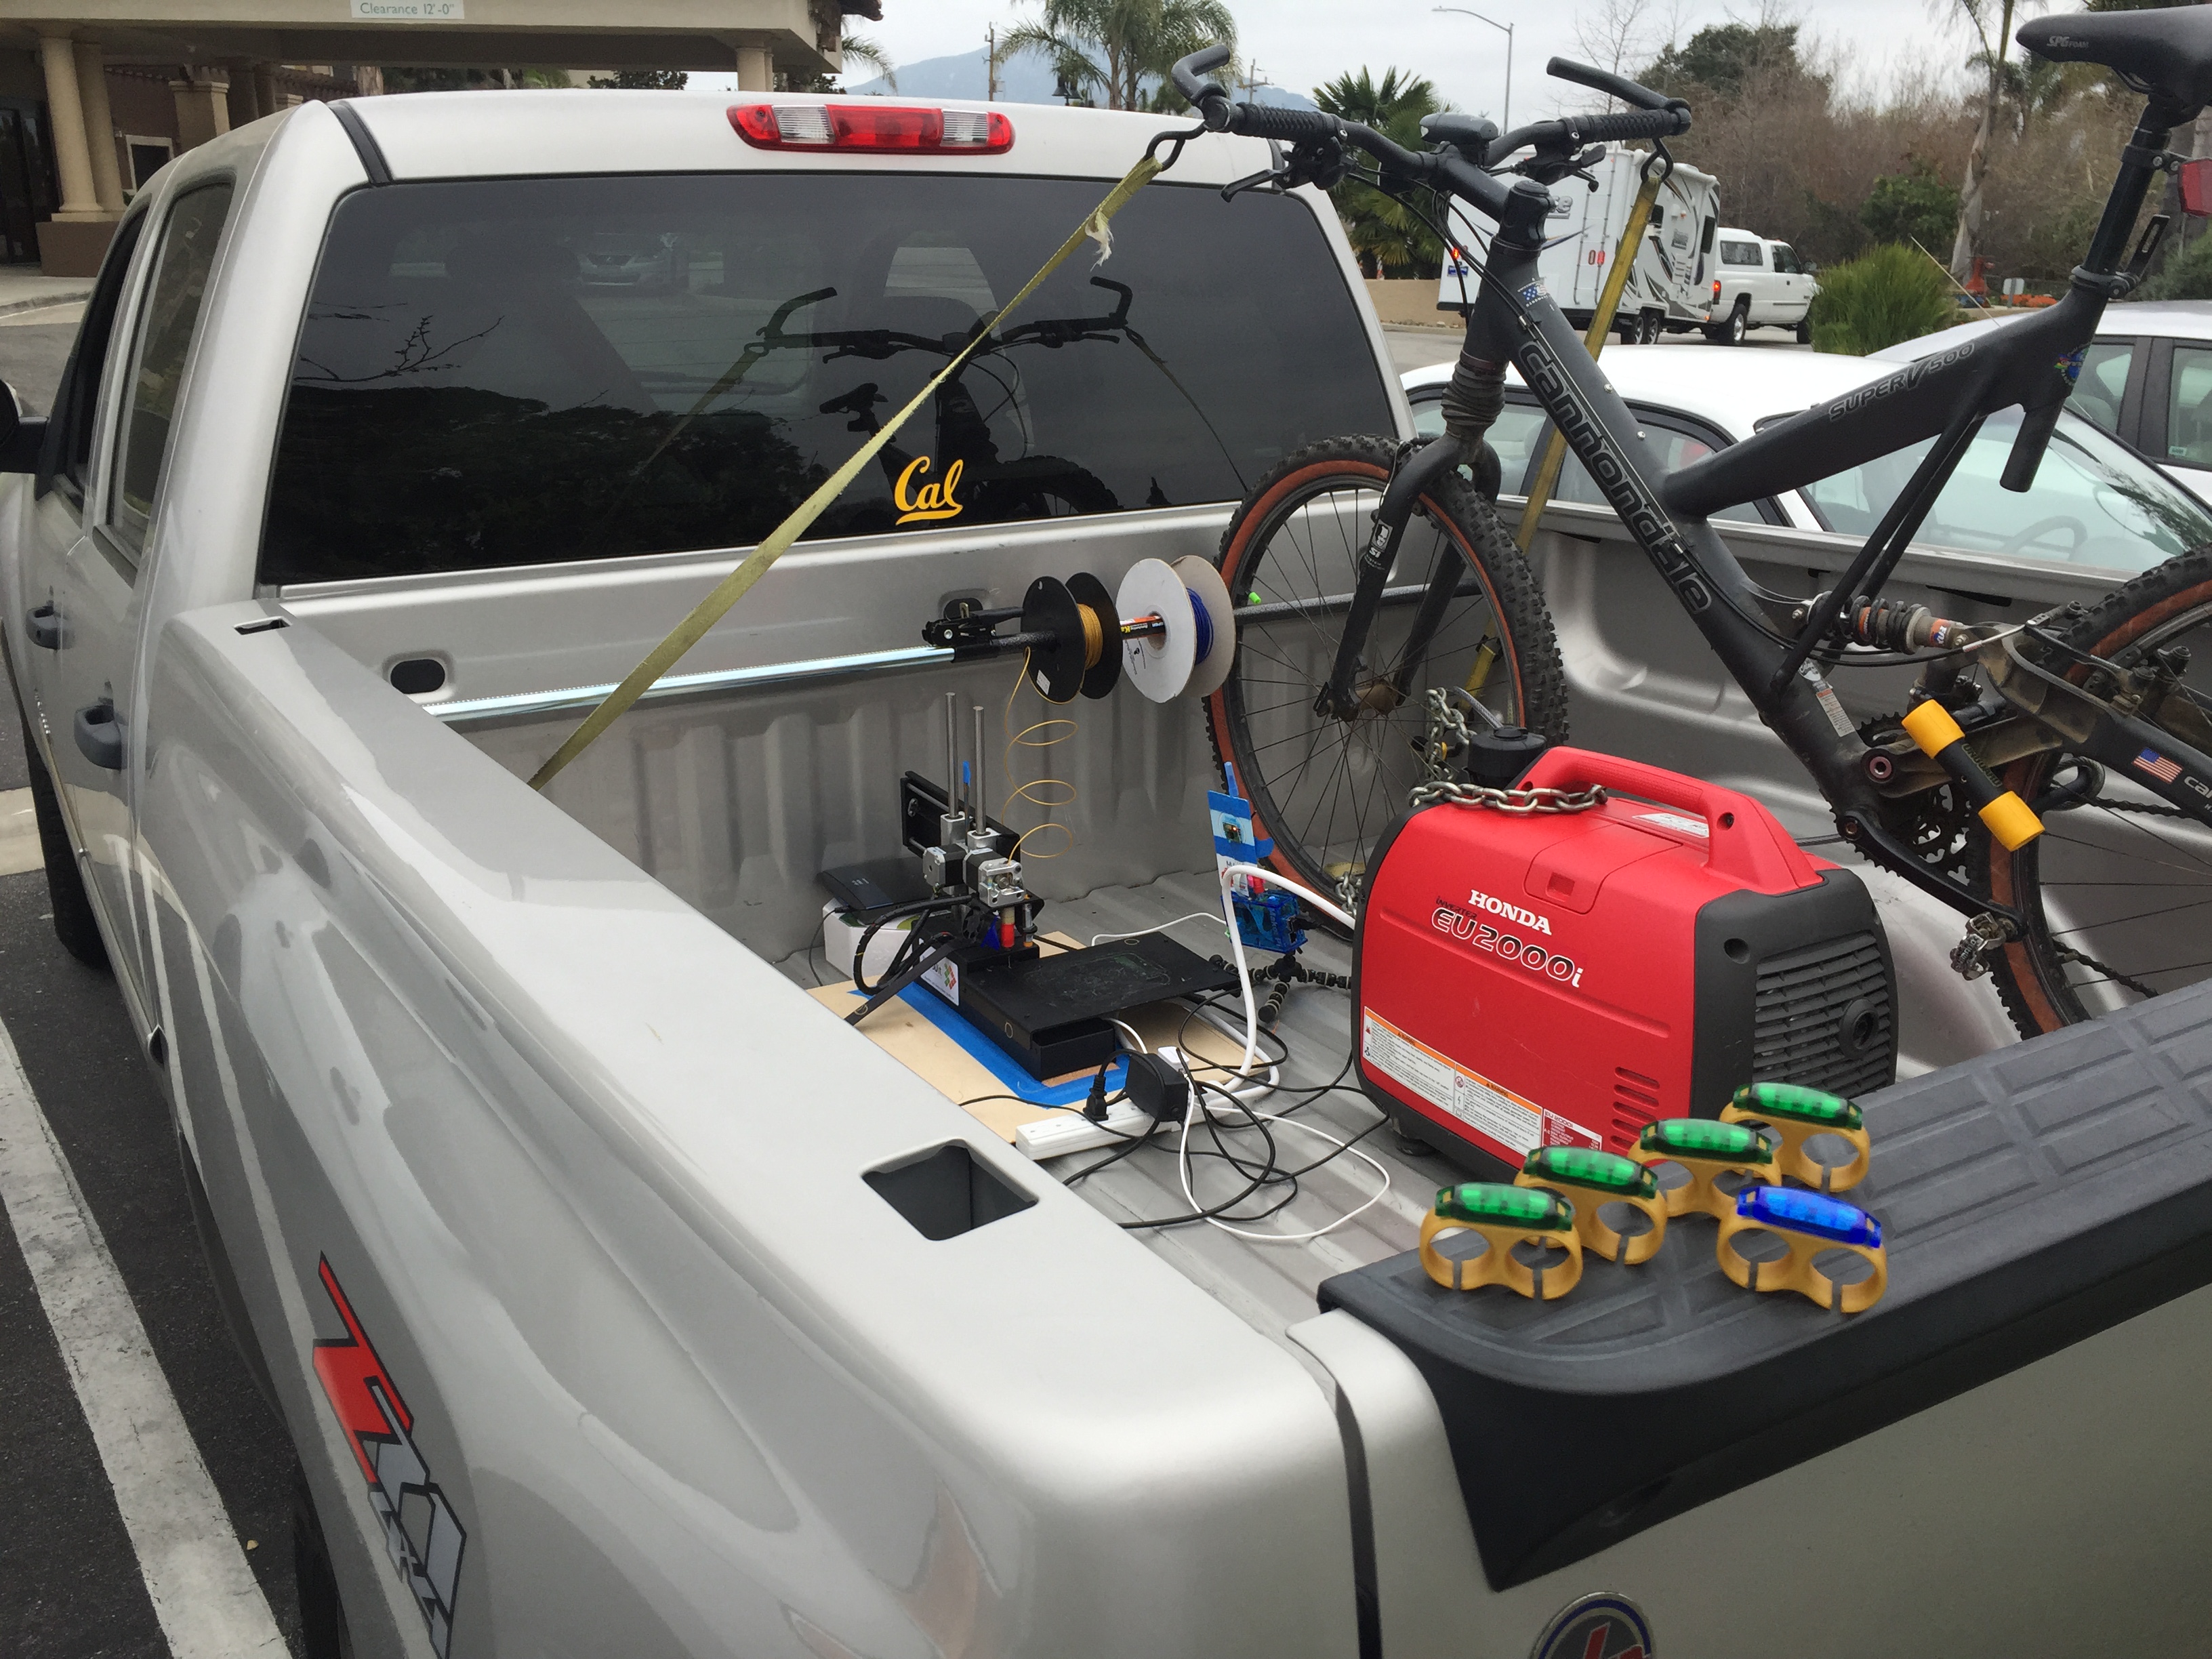
Once at Home Depot, Chris found all the bare essentials to make this experiment work.  Here was the setup:

  1. 1x Honda 2000i (2000W) generator (1000W would also be sufficient) ~$750 from Craigslist.org
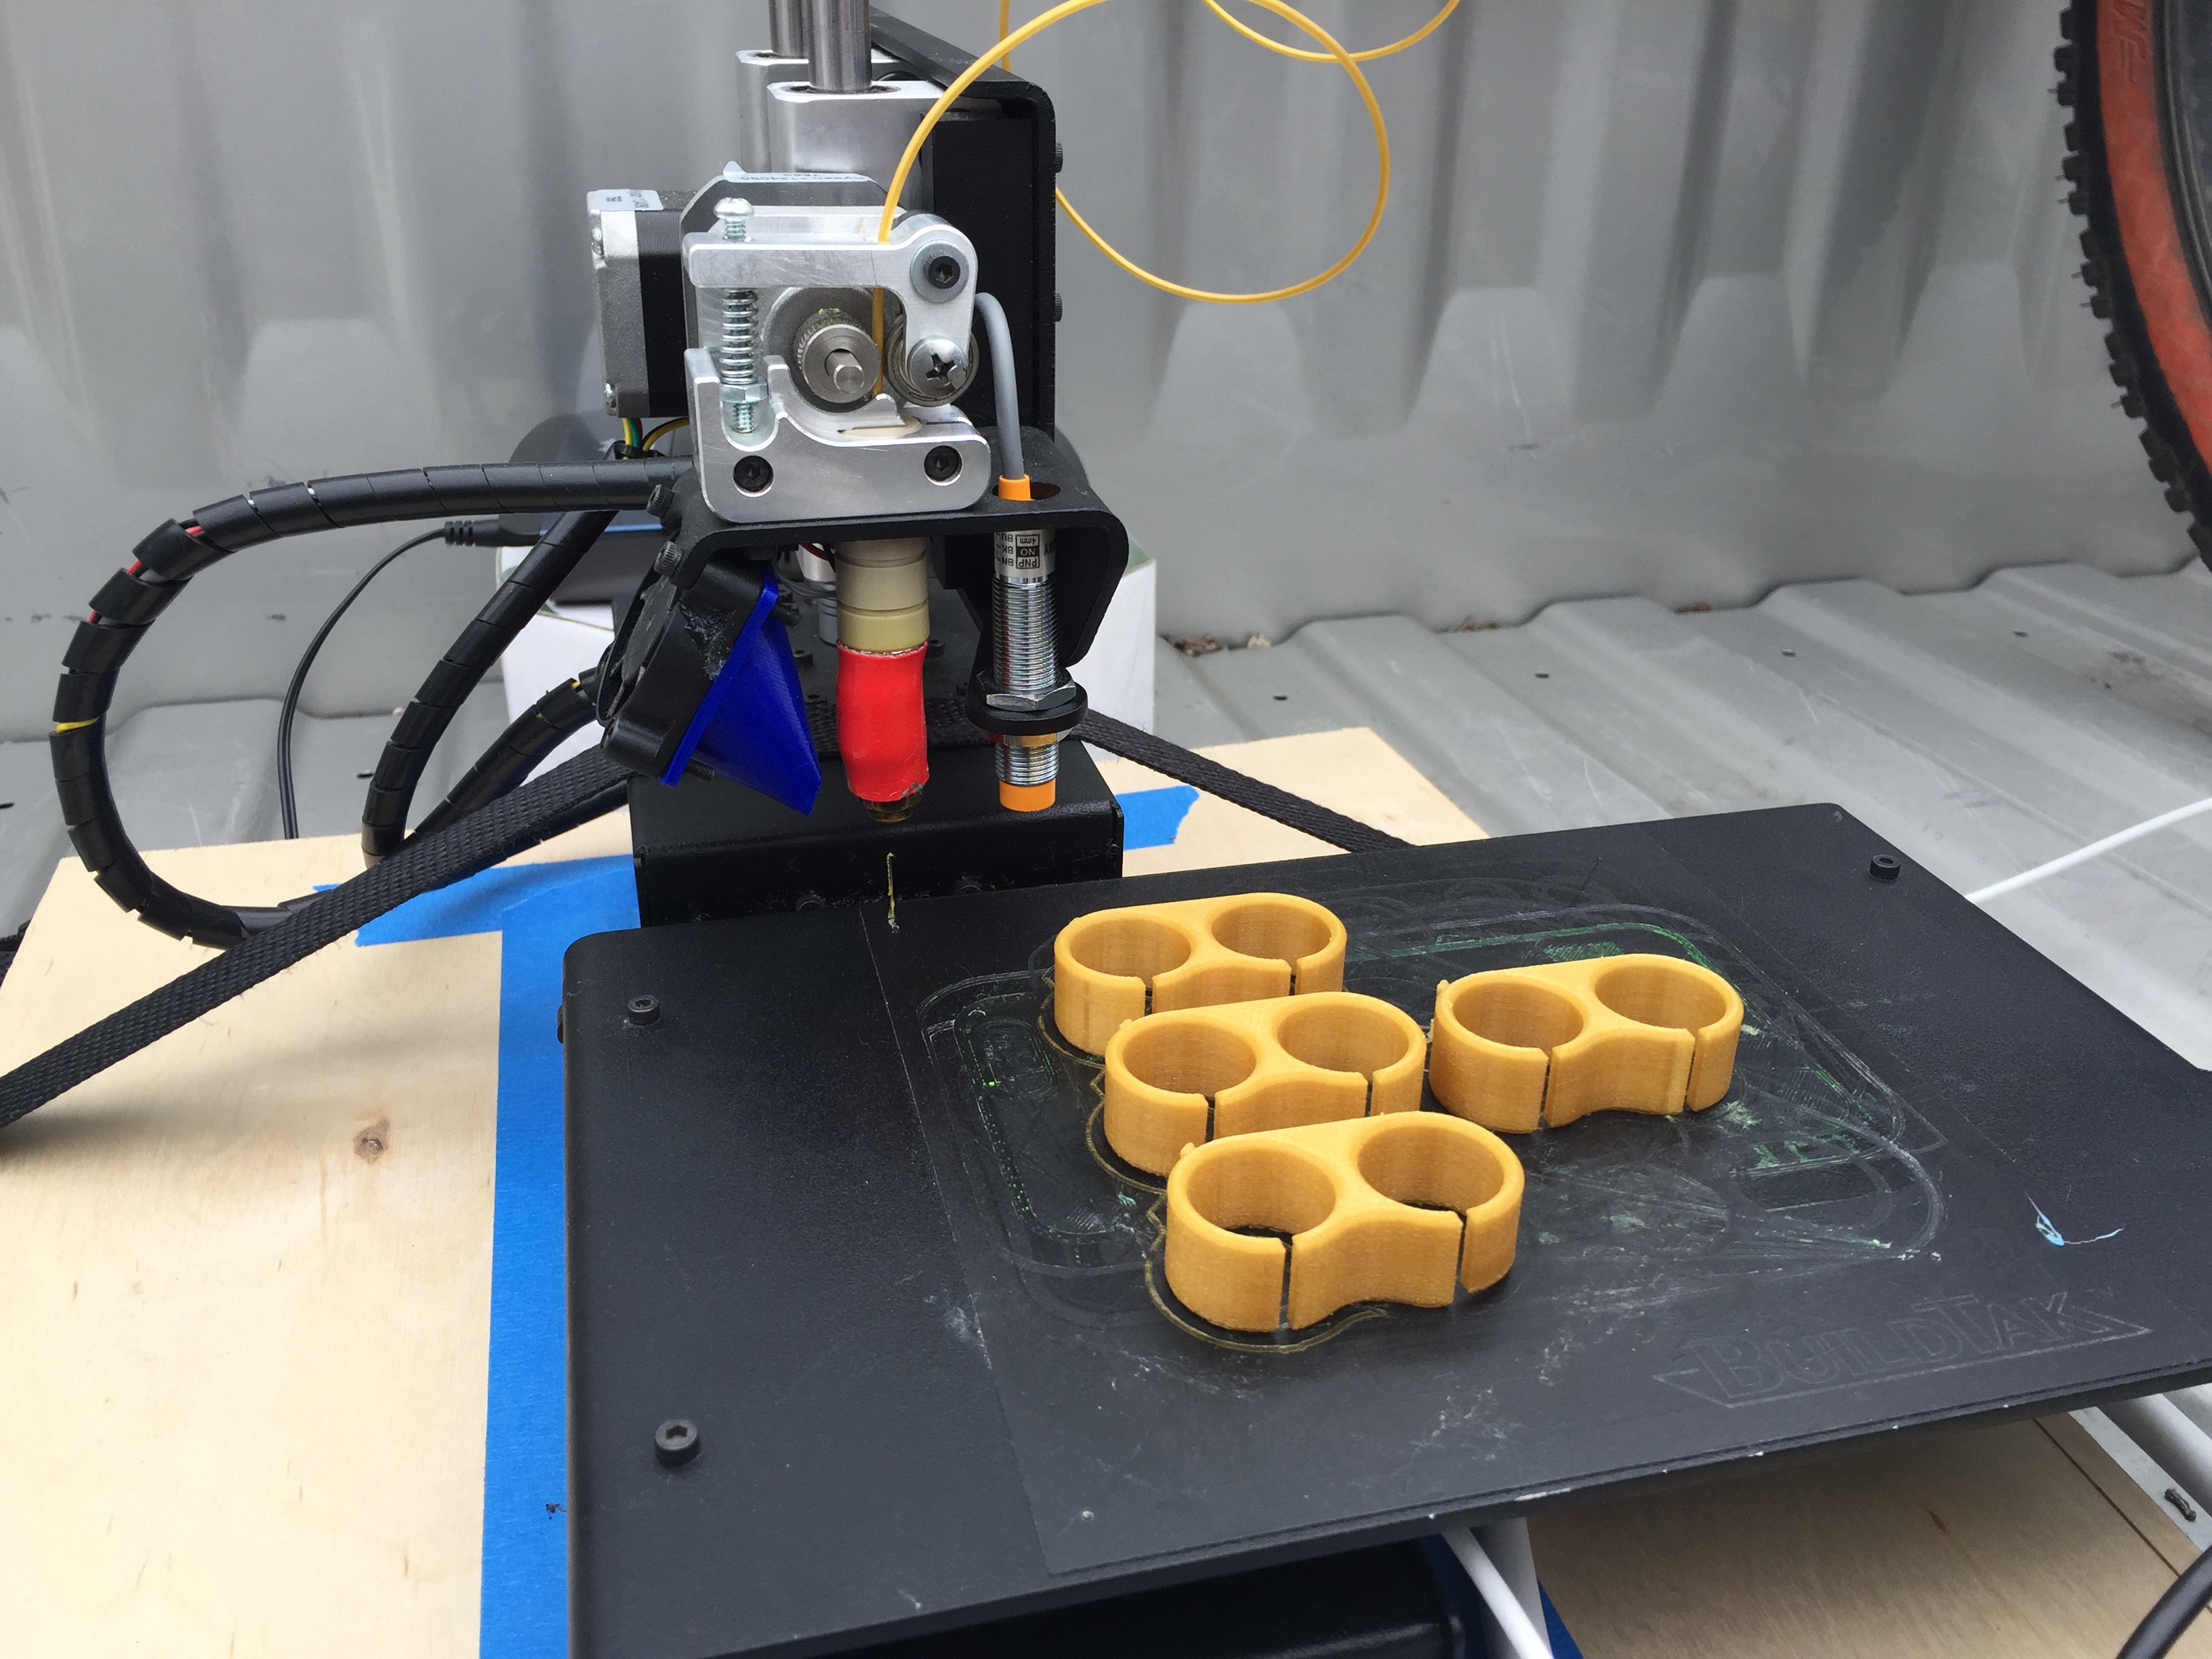
  2. 1x Printrbot Simple Metal ~$600 from Printrbot.com
  3. 4x Spools of Filament (we used scrap filament for initial testing so as not to waste our high-quality Cubicity / Voltivo filament)
  4. 1x Cargo Rod ~ $20 to support the 3D printer filament
  5. 1x Packet of Large Cotter pins ~ $5, these were necessary in order to remove and re-affix the compression pad at both ends of the Cargo Rod so that the 3D printing filament can be slid on and off.  This took a little bit of work with only a LeatherMan.
  6. 1x Panel to increase the base size to prevent tipping of the 3D printer.  A layer of cork was also applied with blue painters tape to add some friction to the Panel to prevent the 3D printer from sliding around.
  7. 1x tie down in order to affix the 3D printer to the Panel
  8. 1x Power Strip for all the 3D printer power needs: 3D Printer Power, Octoprint Server Power and the Cisco Router for a local WiFi network.
Getting everything setup in the BestBuy Parking Lot.
Here in the parking lot of Best Buy, Chris got everything hooked up and ready to print.  That being said, it wasn’t that easy getting everything setup because the Octopi server was setup for Chris’s home network and the WiFi password needed to be changed.  For those of you who have setup an Octopi server, you know how cumbersome the Linux interface for the Raspberry Pi for WiFi dongle connection is and Best Buy became essential to find a HDMI enabled screen to change the WiFi settings.  If you want to setup your Printrbot to run on Octoprint, you can read a blog post on how to do that here.  Thank you Best Buy Pleasanton, CA!!

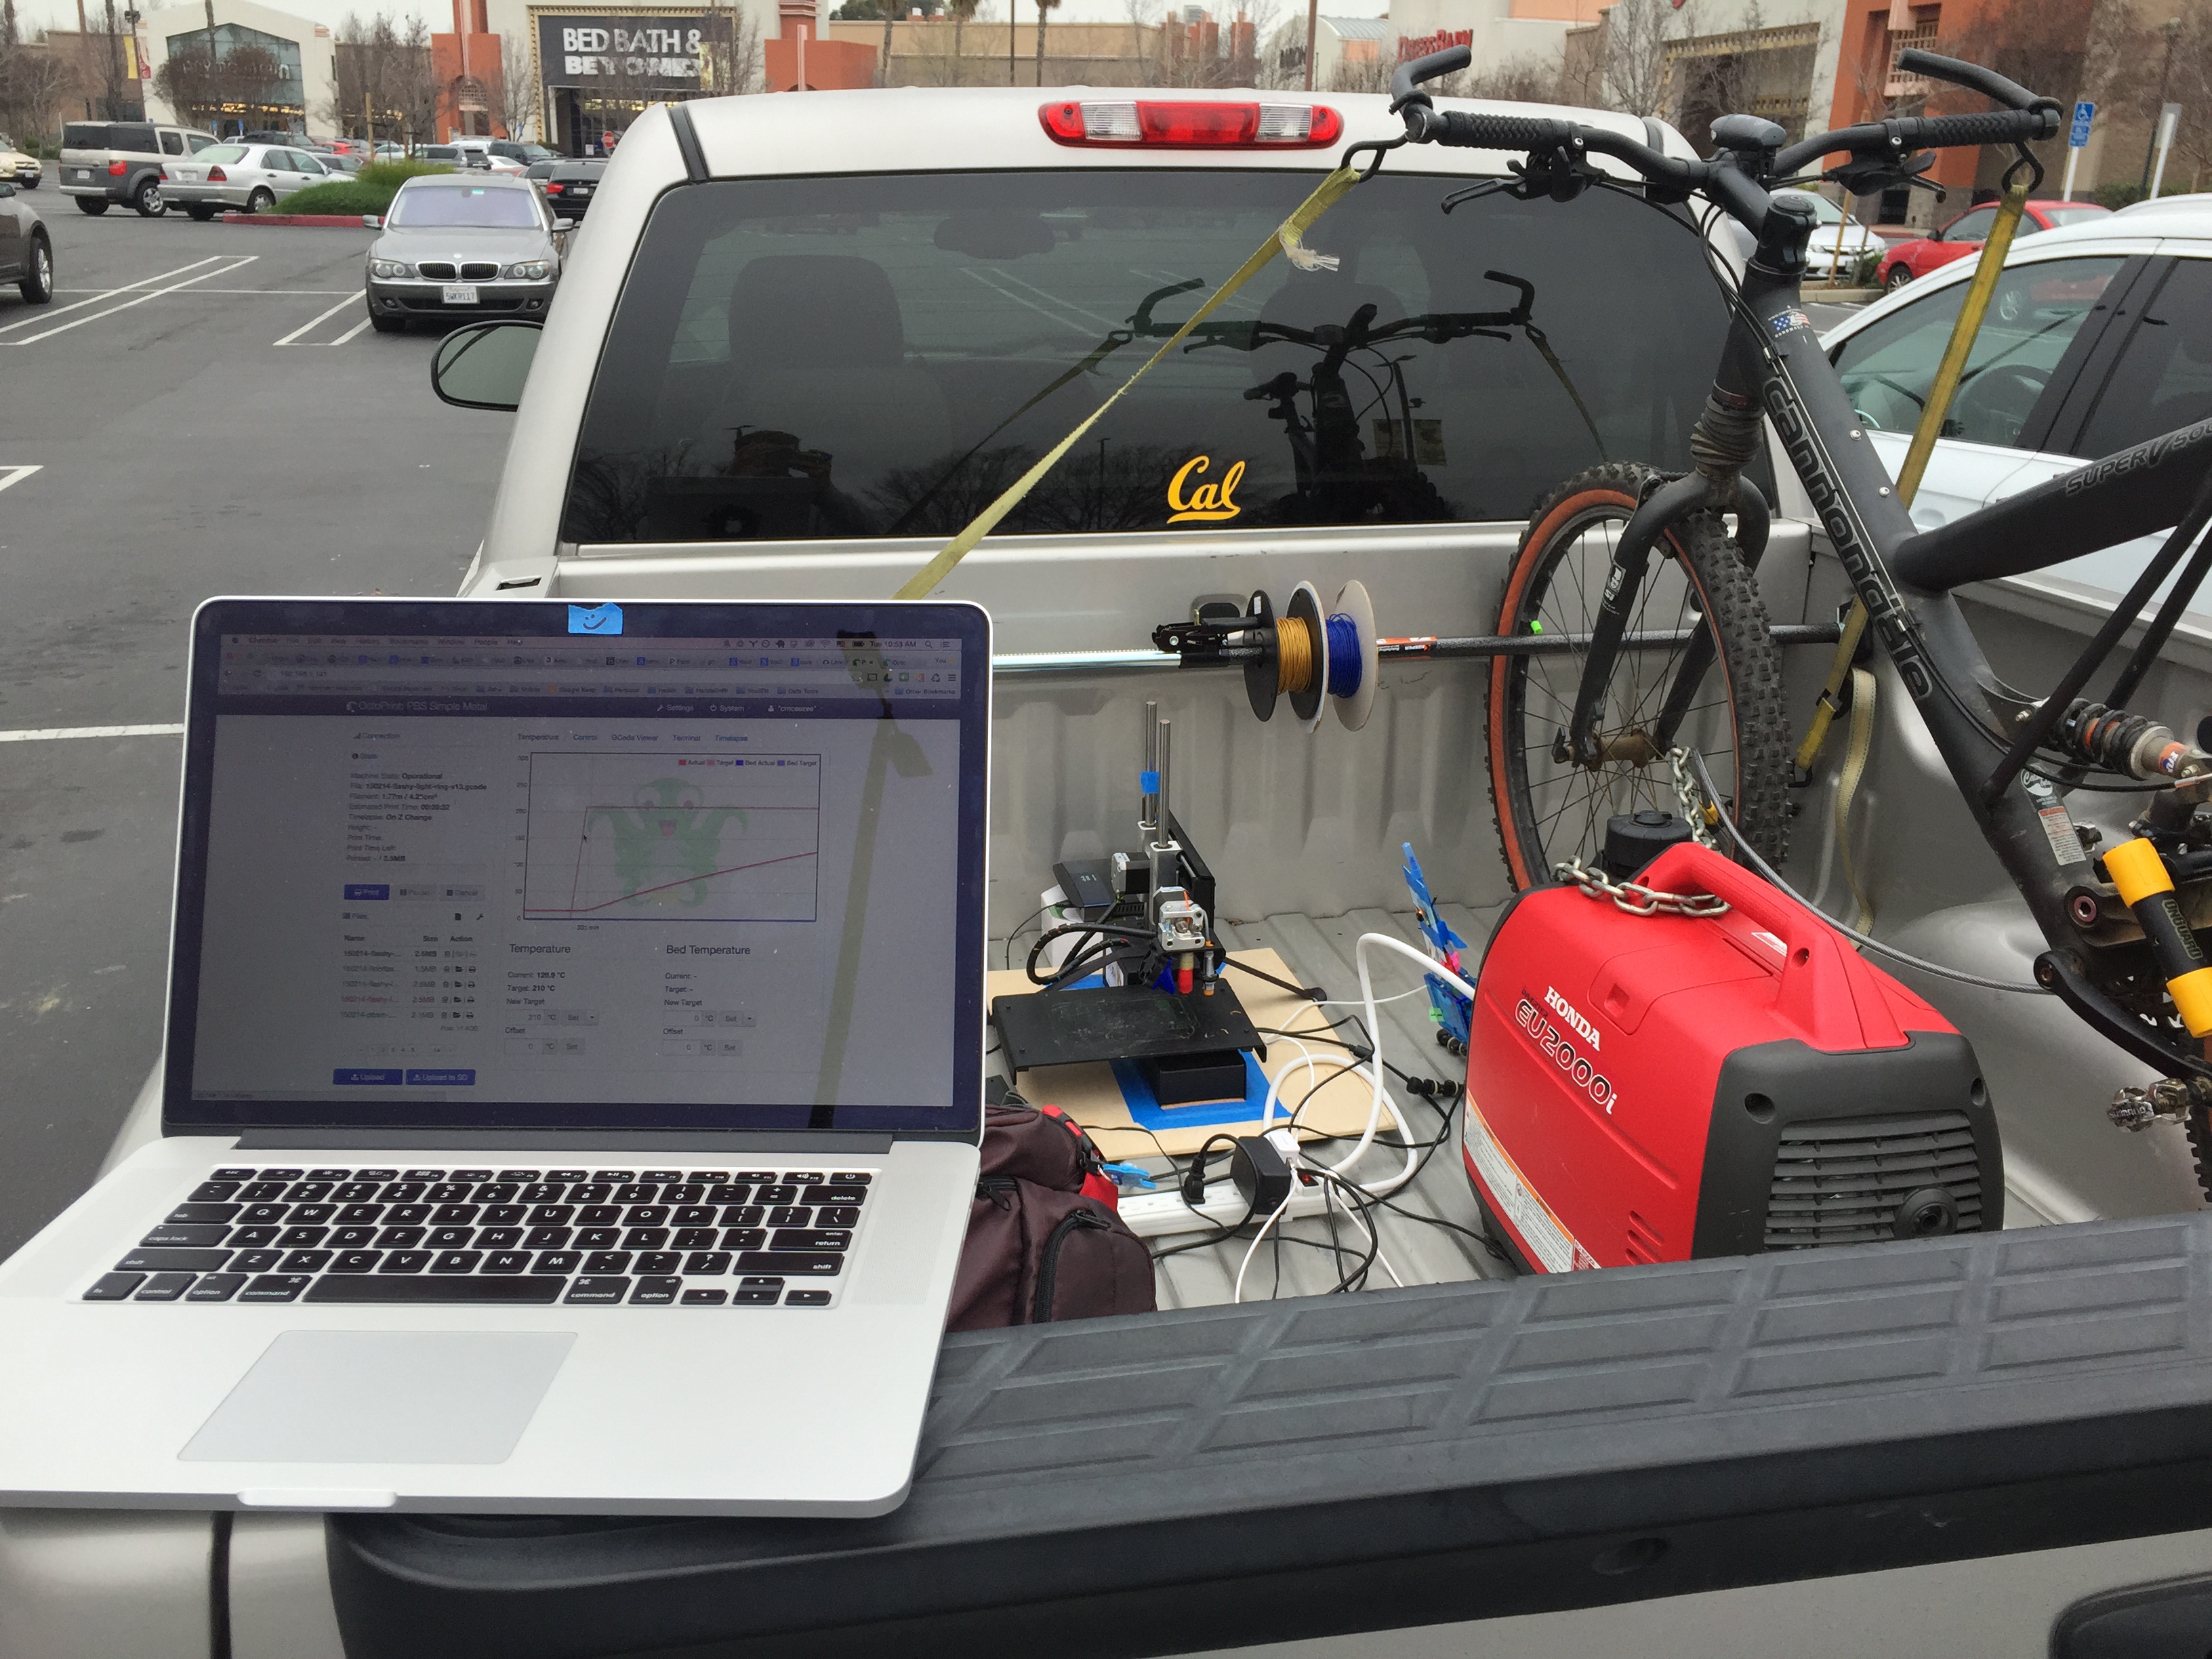
Once the 3D printer was connected w/Octoprint, Chris warmed up the 3D printer and installed the Filament.  The test print?  None other than the You3Dit RaverRing which is currently raising funds on Kickstarter.  If you want to dramatically improve your nightlife, this is one quick and cool way to do it!!

Just getting warmed up to 3D printing while driving.
Just getting warmed up to 3D printing while driving.  The print started with little fanfare and fuel was needed for the trip.  Chris was unaware of how much fuel the generator would need for this 3+ hour print.  A quick Google search suggested 9 hours were possible on one gallon of fuel!  Perfect!

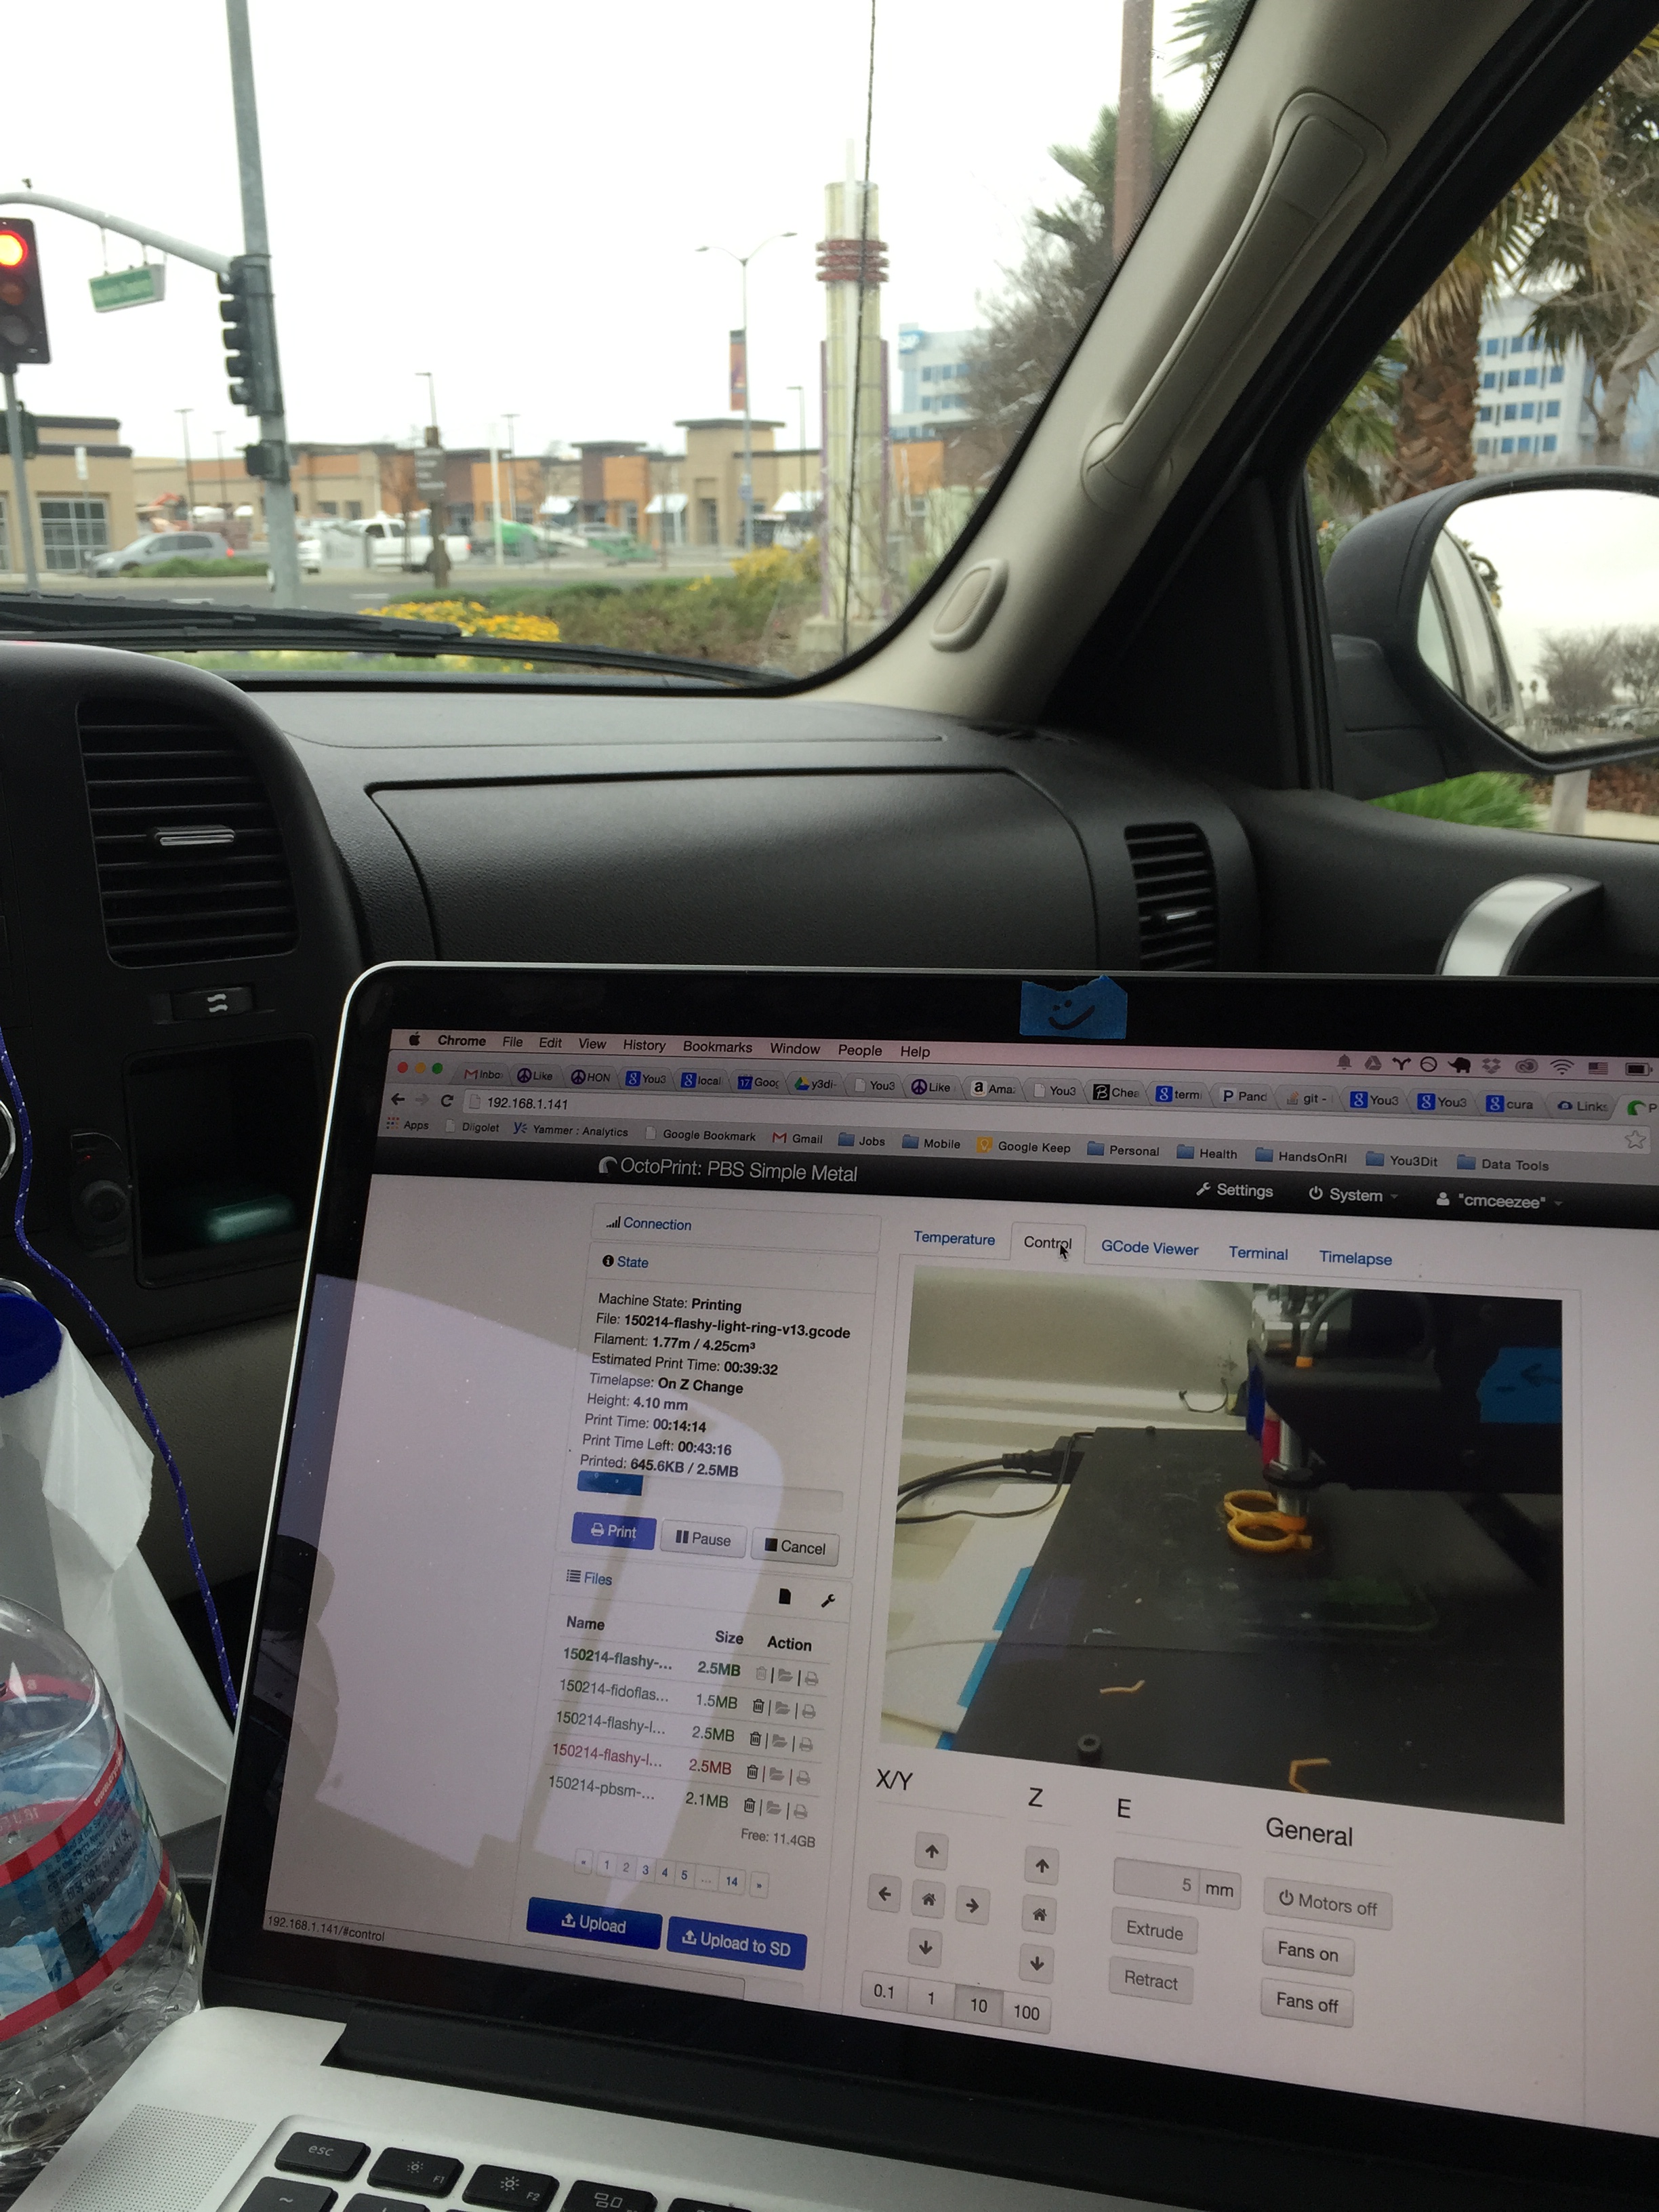
With the generator and truck fueled up, the 3D print continued to rock on.  Here’s the timelapse of the first ever 3D Printed RaverRing traveling at 65 mph.

The Printrbot Simple appeared to have no issues during the print amidst many urban legends describing how gusts of wind can throw off a successful print.  This was not witnessed in this experiment.  Although we failed to capture a screenshot of the temperature as a function of time, there were definitely aberrations in temperature but they didn’t appear to have a significant impact on the output quality of the print.  Also NOTE: I wouldn’t recommend this experiment to anyone (actually…anyone at all period) who has not already really dialed in their 3D printer.

#awesome
#awesome.  If you’re going to try this experiment at home, do so in a safe and controlled environment.  If texting and driving is illegal in your area, it is probably heavily frowned upon to 3D print and drive.  However, once a 3D printer is running and setup well, you can typically set it and forget it.  That being said, you’ll want to monitor the progress because normal 3D printing can have issues like: tangled filament, poor part adhesion to the build platform, clogged nozzle, etc.  DON’T DO THIS EXPERIMENT UNLESS YOU’RE A TRAINED PROFESSIONAL.

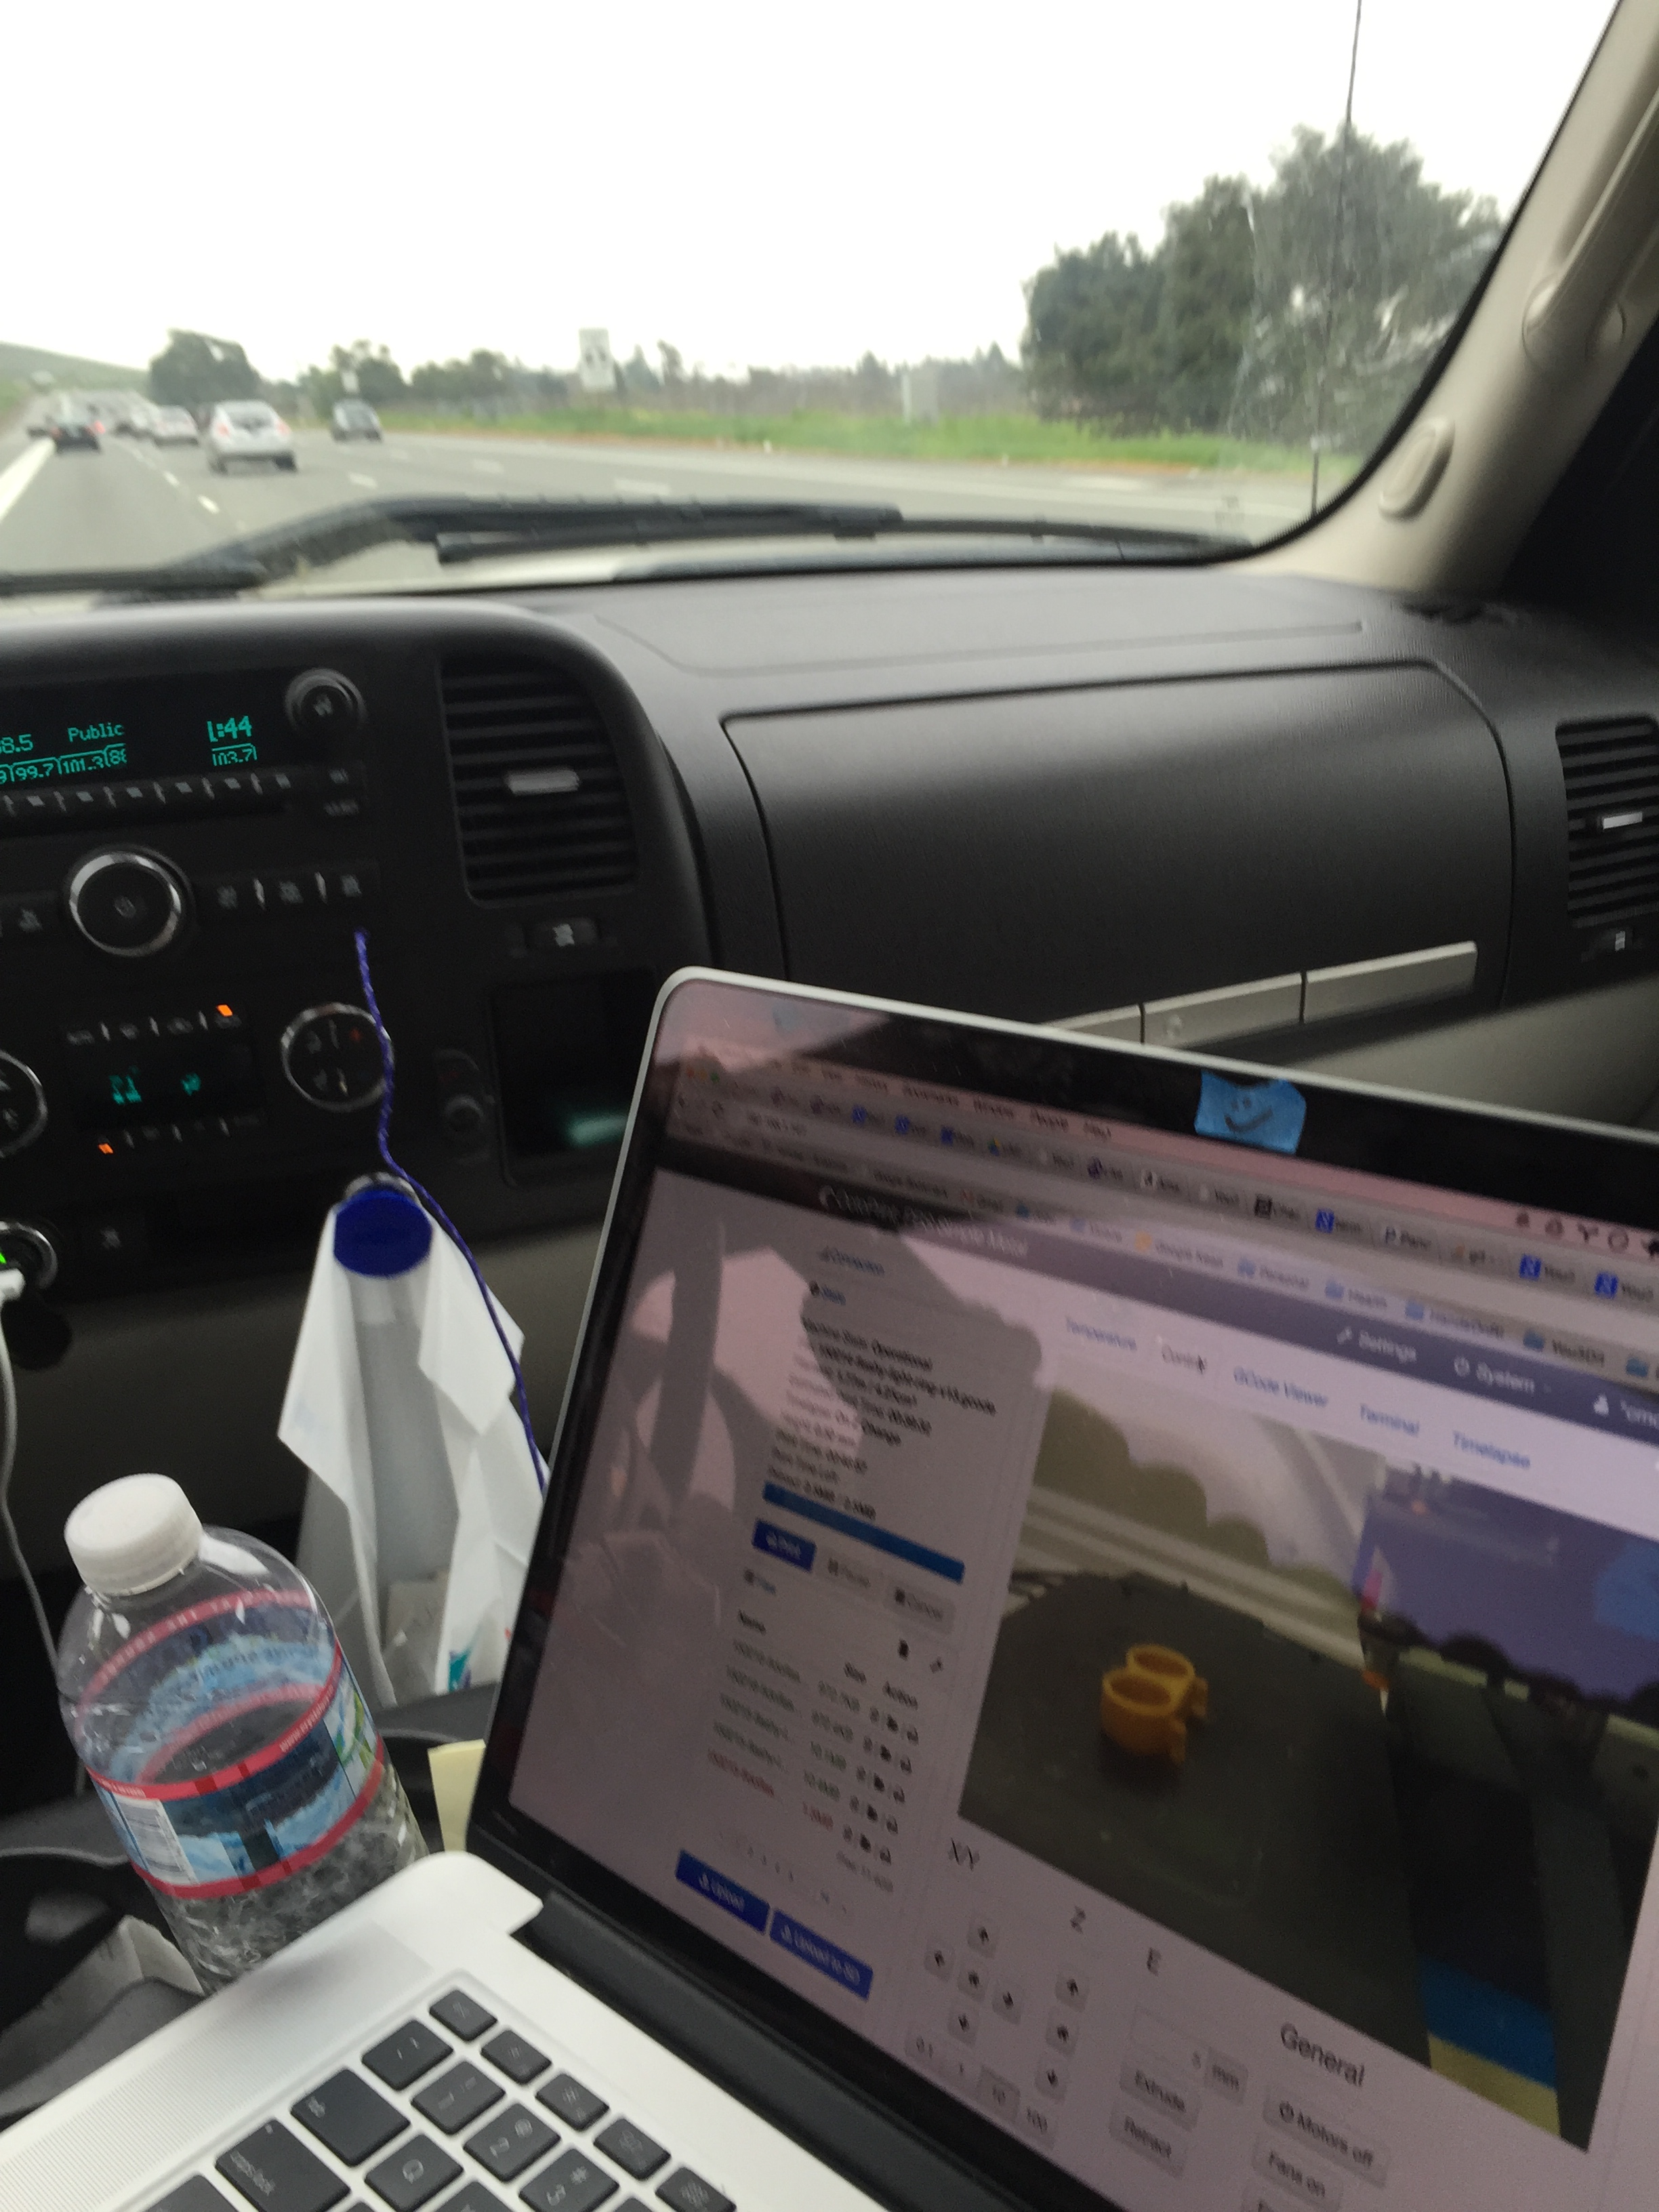
Now that we had built some confidence in the mobile printing, we printed our batch file (*.gcode) and started printing:

04-san-ardo-02
Pit stopping in San Ardo to check the 3D print. We couldn’t connect to the Octoprint server so we wanted to ensure everything was all good w/the print…and it was!

Now we’ve arrived in San Luis Obispo and boom, 3D printed RaverRings.  Had trouble getting reconnected after this print so we ended the mobile 3D printing for the day.

RaverRings all done at San Luis Obispo Marriot
The bicycle in all of these photos has been a foreshadow of something we’re thinking about doing here in June, 2015–mobile 3D printing on a bicycle. Why might you ask? Sometimes you need a spare part for your bike and your fellow riders when you’re riding with over 1000 people. More updates to come.
Finished RaverRings after Mobile 3D Printing
We were worried about delamination of the parts from the platform caused by the erratic temperature in the back of the truck but also because of the bumpy ride. Our bed height has been pretty dialed in so this wasn’t an issue. We’re also really liking our Buildtak.
#Awesome
#Awesome and #Done. 4x more RaverRings to pass out as promos to help drive traffic to our Kickstarter Campaign! http://bit.ly/raverring
After 3.5 hours of driving and 3D printing, we have 4x new RaverRings!
After 3.5 hours of driving and 3D printing, we have 4x new RaverRings! What else would you print? What is appropriate for mobile 3D printing? Let us know what you think in the comments below!

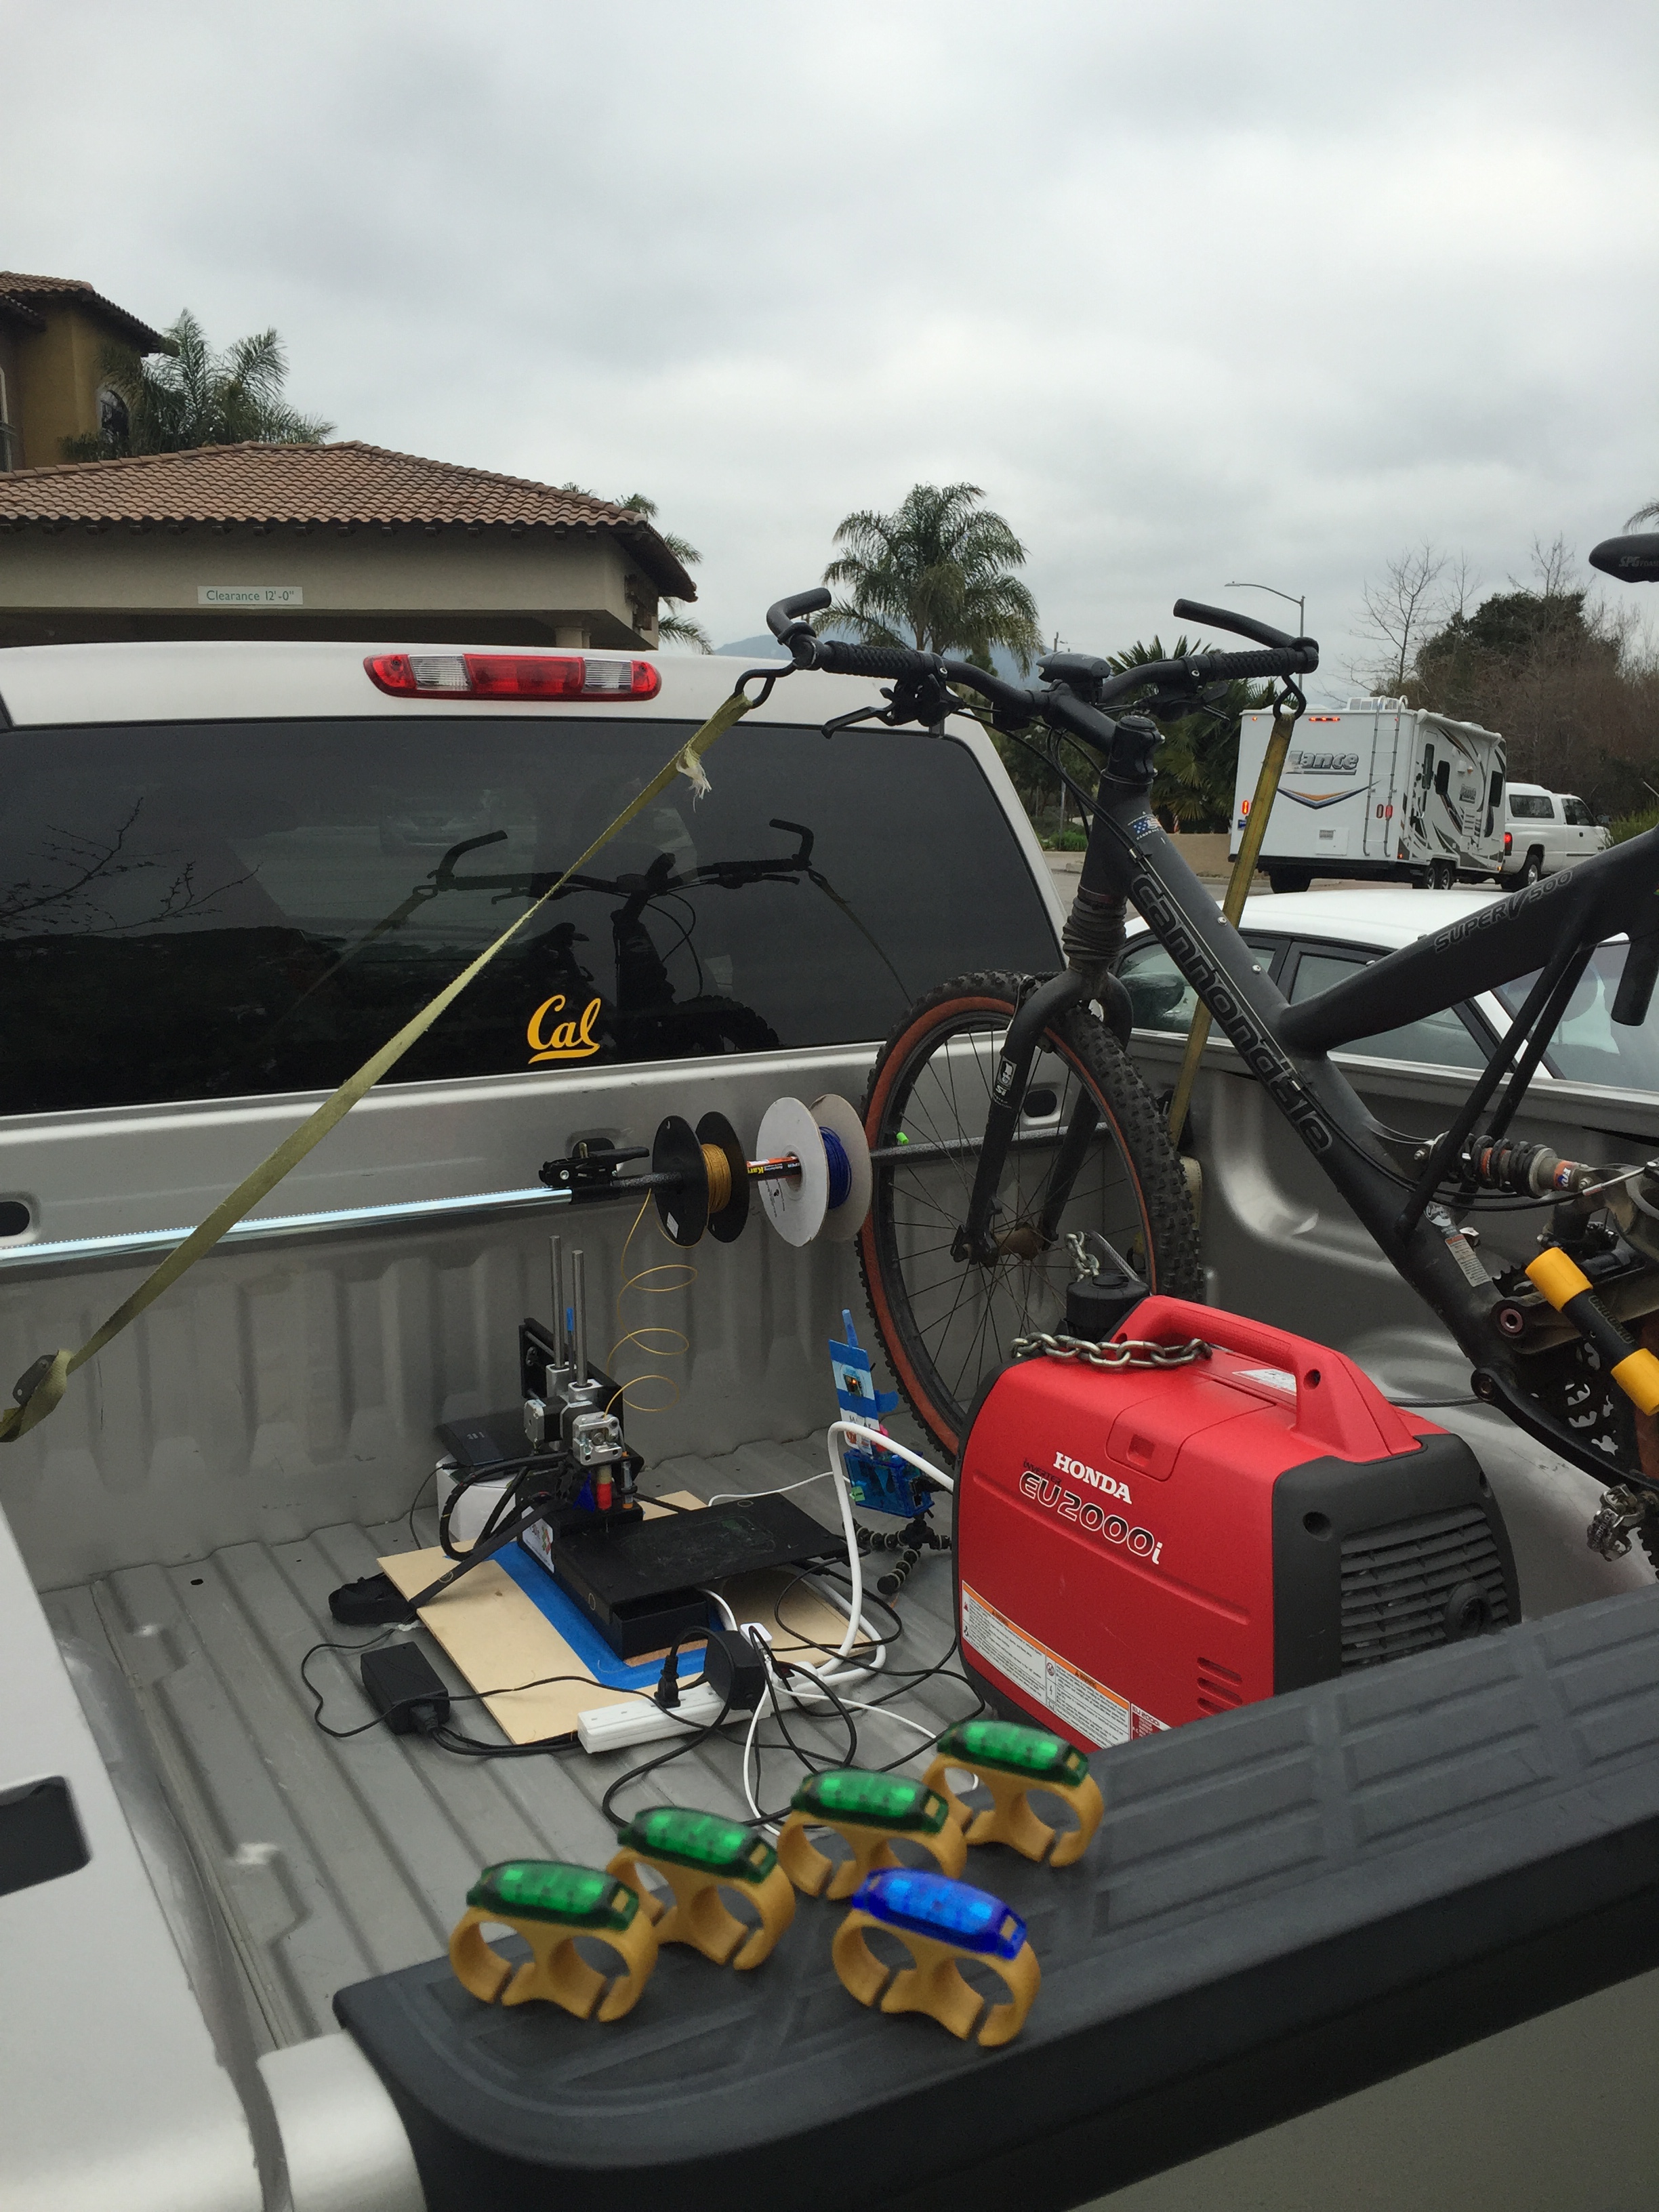
In conclusion, 3D printing can work in mobile and erratic outdoor environments.  We have yet to find a really great application for Mobile 3D printing but that is just currently in our limited mental design space…we know you, our readers, have many more ideas or where this can actually be beneficial.  Let us know and don’t 3D print and drive unless you’re a pro.

https://www.you3dit.com https://beta.you3dit.com https://blog.you3dit.com http://www.linkedin.com/in/chrisdmccoy

One thought on “The Mobile 3D Printing Experiment

Leave a Reply

Fill in your details below or click an icon to log in:

WordPress.com Logo

You are commenting using your WordPress.com account. Log Out /  Change )

Facebook photo

You are commenting using your Facebook account. Log Out /  Change )

Connecting to %s

This site uses Akismet to reduce spam. Learn how your comment data is processed.